• Skip to primary navigation
  • Skip to main content
  • Skip to primary sidebar
  • Skip to footer

Ren Behan - Author Wild Honey and Rye

Food Writer

  • Buy the Book (USA)
  • Media
  • Recipes
  • Lockdown
  • Buy the Book (UK)
  • About Ren
  • Blog
  • Widget Area for Top Menu

Cream

March 25, 2015

Banoffee Eclairs

Homemade Banoffee Eclairs

Banoffee Eclairs

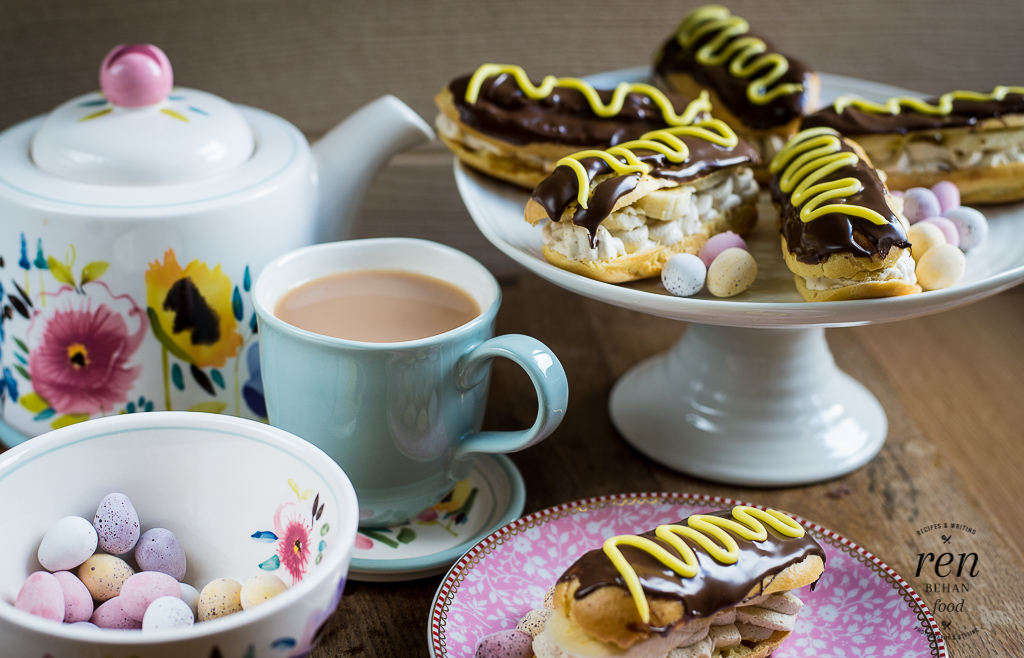
Spring is here! This is a recipe from John Lewis COOK Edition…

A short while ago in the food world, a prediction was made that éclairs would be the new cupcake and there are now all sorts of weird and wonderful flavours to try in the trendiest bakeries. I’m sure we’ve all had one from our local bakery – traditionally, an éclair is made from choux dough or pastry, filled with cream and topped with chocolate or fondant icing.

In this post, Love & Olive Oil set their readers a challenge to bake éclairs and they came up with some stunning entries. And I’ll never forget reading this wonderful post by David Lebovitz on Éclairs in Paris – or l’éclair – not to be missed.

The éclair originated in France in the 19th century and, as I’ve discovered this week, they can be made at home, with relative ease. I say that, because there are a couple of steps to follow when making the choux and you do have to pipe, but since the choux is later split and filled and topped with chocolate, they don’t actually have to be perfect.

If you can make éclairs then you can make profiteroles (or cream puffs) and vice versa, so they are a good thing to add to your repertoire. Plus, anyone you serve them to will be incredibly impressed!

…

Read more

February 28, 2012

Malted Milk Ice Cream (No Churn) with a Quick Mars Bar Sauce

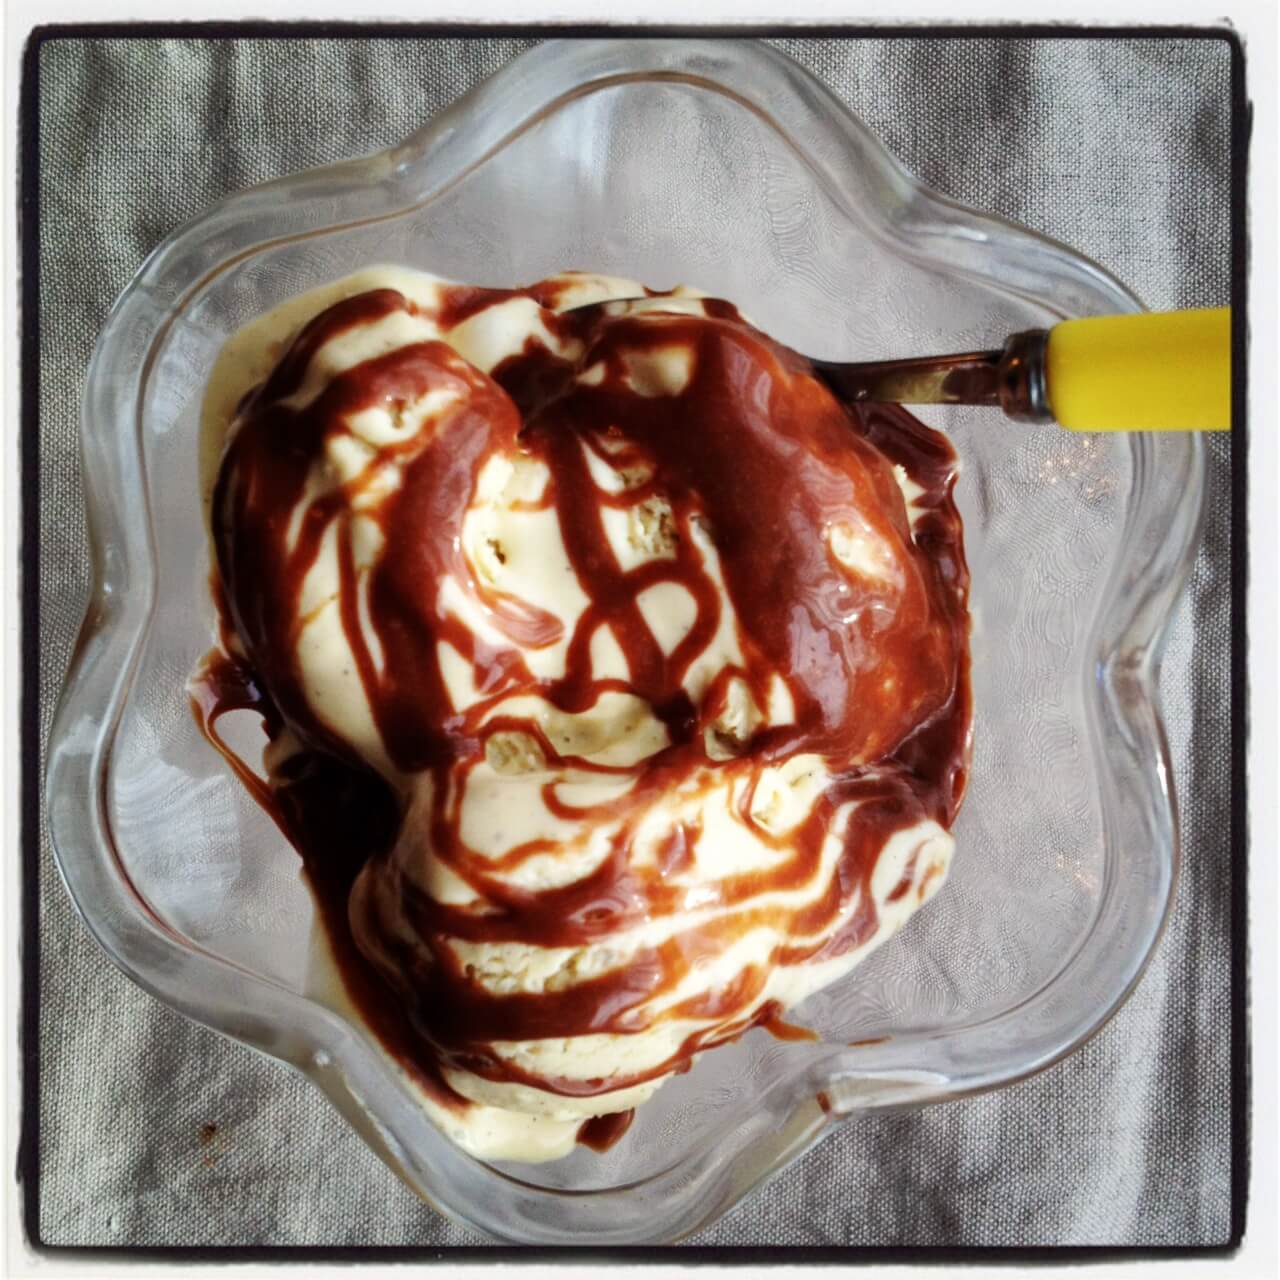
This is really Part Two of the ice cream challenge! Before the weekend, I began by making a malted milk custard base for my very first ever home made ice-cream for Kavey’s Bloggers Scream for Ice Cream challenge! I’m only just in time as today is the last day to post entries, but I think I can do it! The good news is – it worked!

Malted Milk Ice Cream with Mars Bar Sauce

A quick re-cap – I learnt that to make a custard-based ice-cream, you first have to make a very simple custard, with egg yolks sugar, double cream and milk. For added flavour, I used vanilla sugar and 50g Horlicks, or Malted Milk Powder.

I followed the instructions for Malt Chocolate Ice Cream on BBC Good food here – I didn’t use the melted chocolate or Irish cream liqueur. After taking a cupful out to go with some seasonal rhubarb, I put the rest into a metal loaf tin and into the freezer.

Since I don’t have an ice-cream maker, I used a no-curn method, using a spatula to stir every 30 minutes. It actually came together really well – no great disasters!

Then I read Laura’s post on Ginger C’Rum Ice Cream and she suggested mixing it with a fork after the first 30 minutes and then every 30 minutes for at least the next 3 hours.

I also read that you can, in fact, use an electric whisk to mix the ice cream once the ice crystals start to form, so I will try that next time.

David Lebovitz has also written a great post on How to Make Ice Cream Without a Machine and incidentally, James left a comment to say he had tried a Malted Milk Ice Cream from David’s book The Perfect Scoop – so if you have that you could just follow David’s recipe and instructions in full – it’s on my wish list!

Quick Mars Bar Sauce

All that was left was to make a suitably quick and easy sauce, so out came two Mars Bars and some double cream. To make the sauce, you literally chop the Mars Bars (I had about 170g worth), put them into a bowl over a pan of simmering water (bain marie method) and stir until it is melted adding 1-2 tablespoons of double cream and then 1-2 tablespoons whole milk if it is too thick. There will be a few lumps as the caramel melts, but you can use a whisk to smooth it out. You can make Mars Bar sauce in the microwave too, just keep stirring every 30 second until it is all combined and melted.

My little boy was fighting a fever yesterday and so was home from school. Guess what? He managed some ice cream!

Why You Should Make Your Own Ice Cream

Shockingly, I looked at the ice cream in the freezer that I would have given my son, had I not made my own. It is a well-known UK brand, bought at the supermarket called “Classic Cornish Vanilla Ice Cream” – note, the box says “Simply 100% Dairy Ice Cream With Real Cornish Cream.”

Here are the ingredients on the shop bought ice cream – “Reconstituted Skimmed Milk, Water, Sugar, Glucose-Fructose Syrup, Cornish Cream, Whey Solids, Glucose Syrup, Butteroil, Emulsifier (mono and di-glycerides of fatty acids), vanilla extract, stabilisers (locus bean gum, guar gum, carrageenan), colour (mixed carotenes), flavouring.”

There are at least 6 ingredients in this shop bought ice cream that I don’t recognise.

Moral of the story – check the ingredients OR MAKE YOUR OWN!!!!!

Thanks Kavey for hosting this challenge – I have not only learnt a new skill, I have gained a new a LOT of knowledge in the process!

IceCreamChallenge

What’s your favourite ice cream flavour/combo?

Have you got an ice cream machine?!


February 26, 2012

Penne Cocoa Pasta with a Creamy Mushroom Sauce

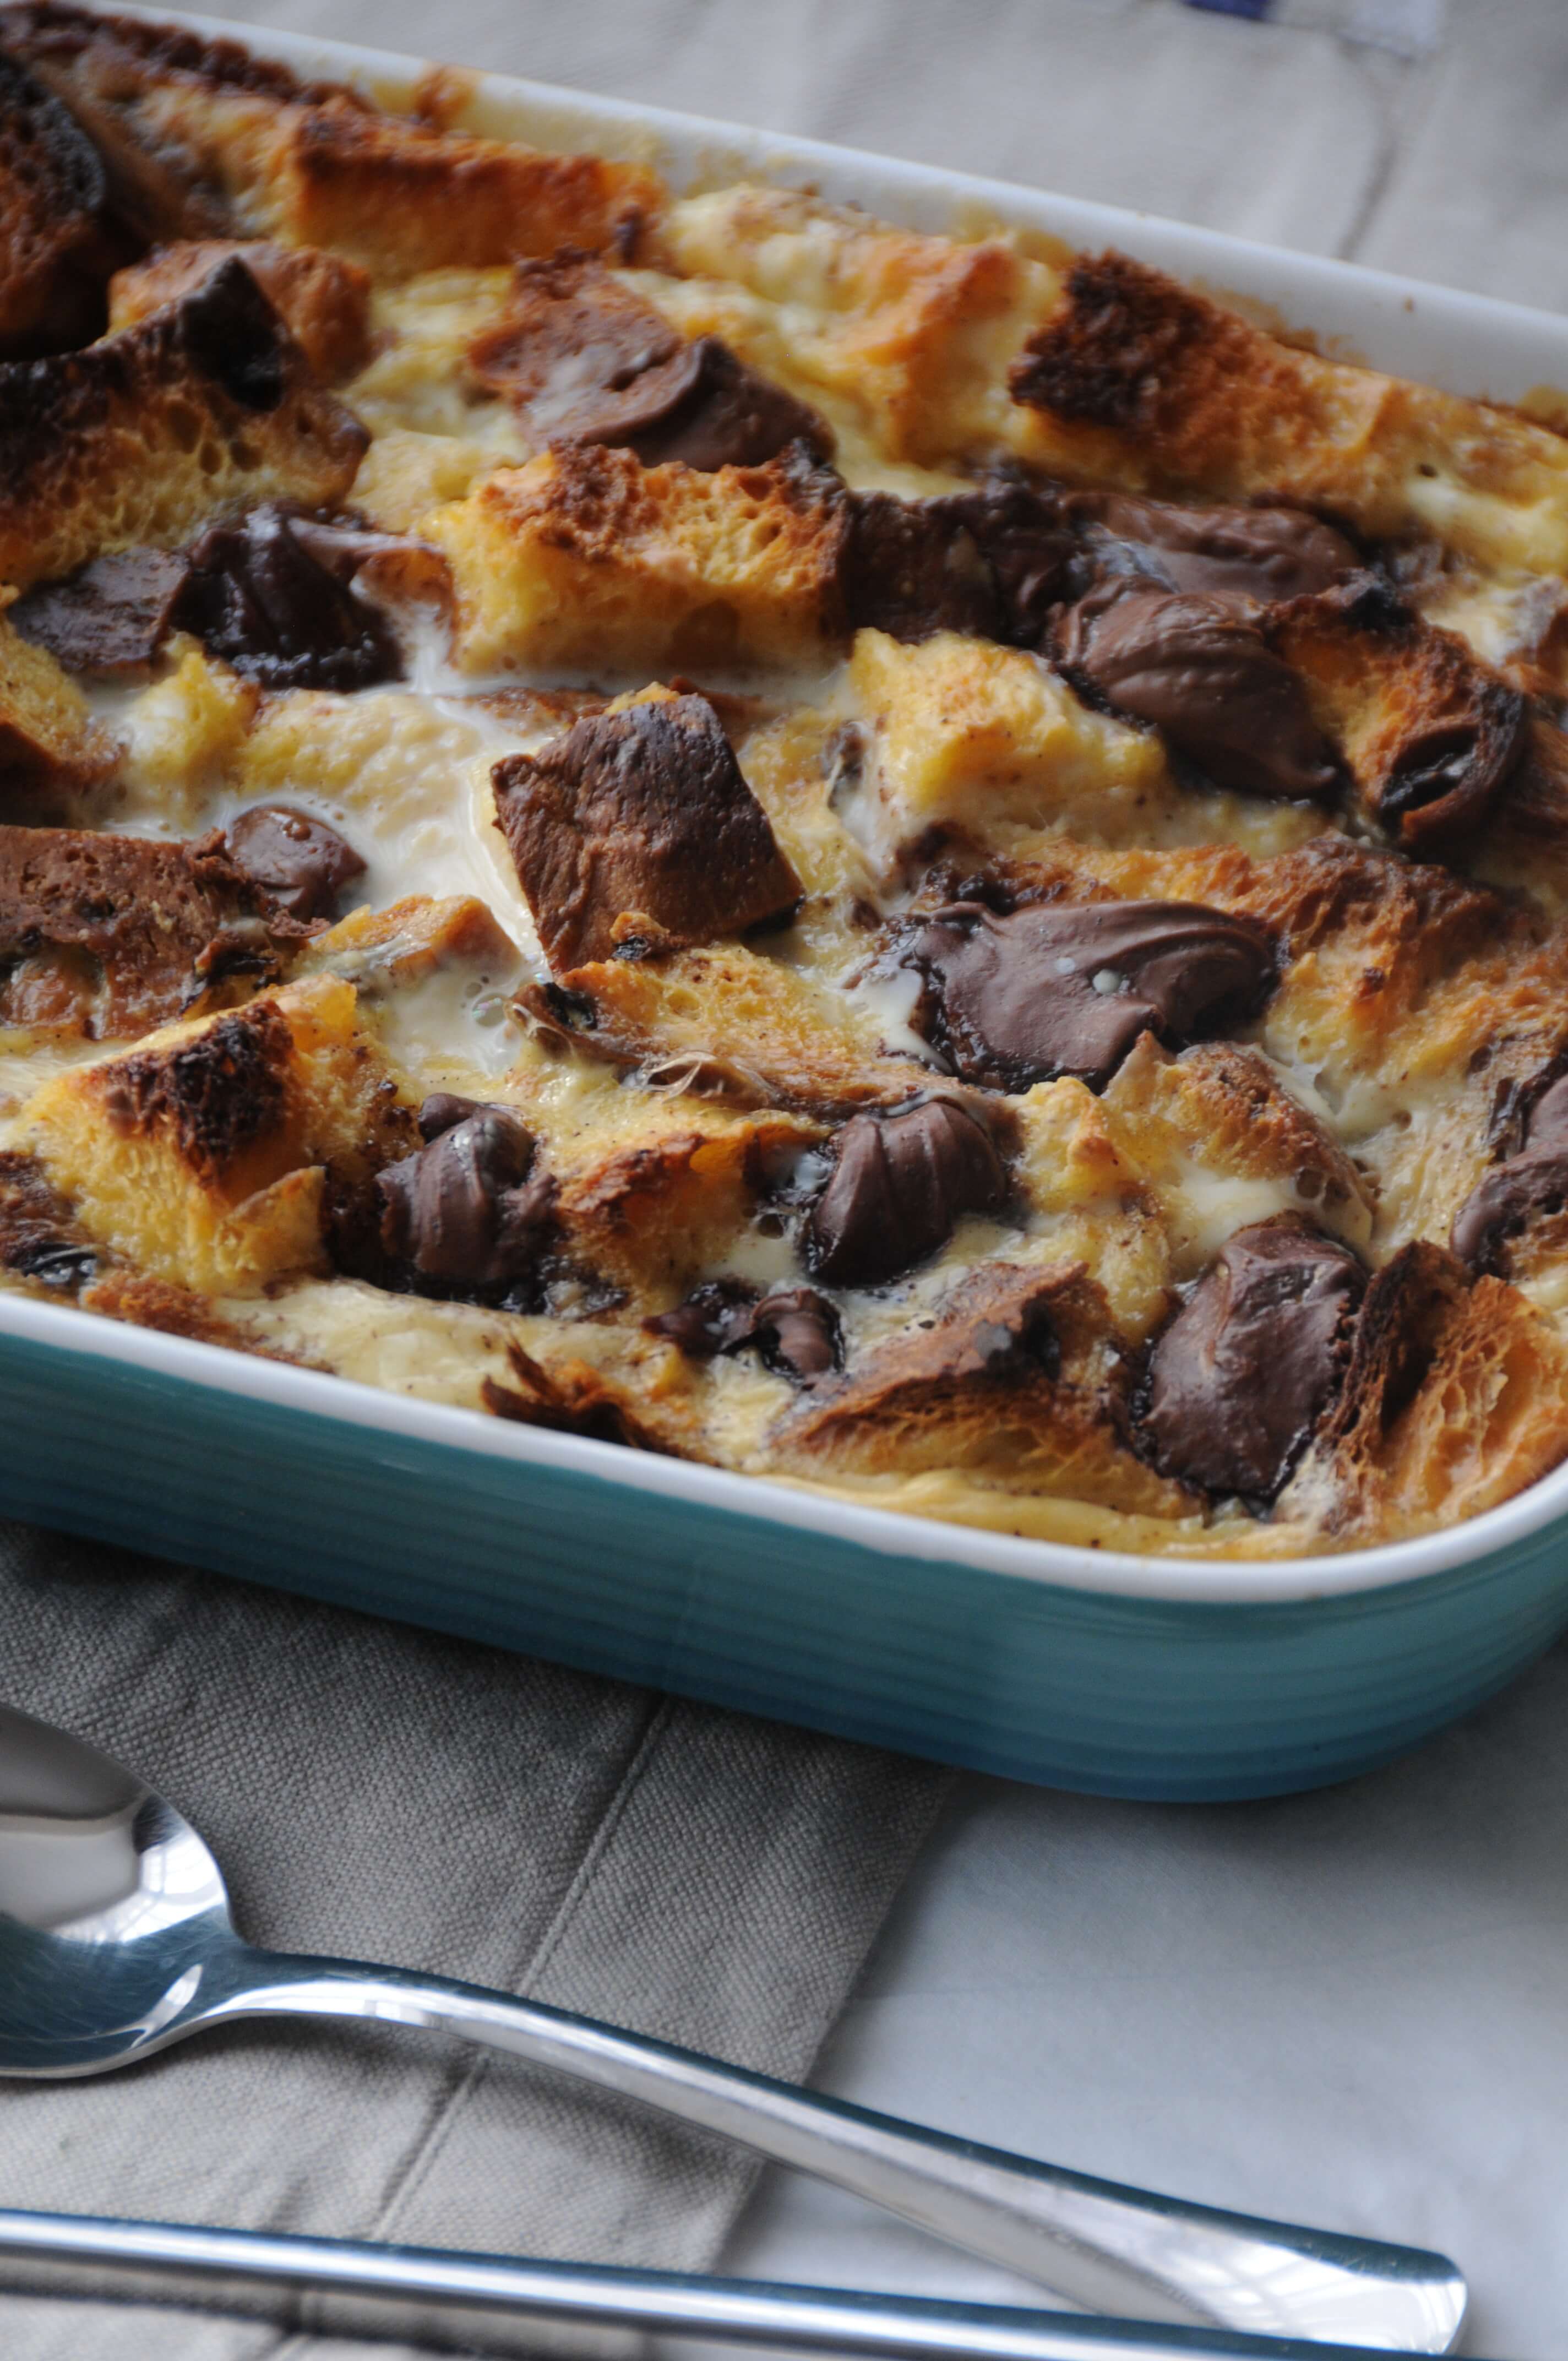
I have to admit to being completely stumped this month when I saw the We Should Cocoa challenge set by Choclette over on her Chocolate Log Blog. The February challenge was to come up with something chocolate, savoury and vegetarian. Not many things came to mind. Until, at the very last minute, I spied a packet of chocolate/cocoa Penne pasta and had a flash of inspiration! I found the pasta in my local Hotel Chocolat store (the smell always seems to intice me inside) in a little corner called Cocoa Cuisine, which including the chocolate pasta, cocoa nib balsamic vinegar and interestingly too, a black truffle and chocolate tapenade. So, I quickly swiped a packet of pasta (at £5.00 per 250g it is a bit extravagant) and decided to go home and cook it for our lunch with a creamy mushroom sauce (ingredients already in the fridge.) 
 
 
The result – well, I’d say that the pasta has a much stronger aroma of cocoa than flavour. The taste is actually extremely mild. I’m wondering whether a spoonful or two or some organic cocoa powder in the sauce wouldn’t have gone a miss just to add an extra hit. The children had some of it plain, with butter and were quite excited about getting chocolate pasta, although at that price, I told them not to get used to it! Having said that, we each had a bowl making the dish (including the mushrooms and cream) something around £1.75 a head – s0 perhaps for a dinner party or a special supper this wouldn’t be so bad. You can also use the pasta to make sweet dishes, although the recipe included on the packet was for Salmon and Mascarpone Cocoa Pasta…maybe that will be next?!
 
I also asked my sister who lives in Italy whether she had heard of chocolate pasta and she said she had and told me about a ‘Chocohotel’ in Perugia. A quick look at the restaurant menu revealed Ricotta cheese patties with chocolate and sweet pepper cream and Pasta with cocoa and courgette – so two more savoury, vegetarian dishes to fit the brief! Perhaps it wasn’t such a wild idea after all!


[gmc_recipe 2807] 
 
Keep an eye out for Choclette’s round-up to see all the other exciting creations. I’m pleased I joined in – I’m quite inspired by the idea of Cocoa Cuisine!
 

 Have you ever cooked a savoury dish with cocoa?!

February 24, 2012

In Season: Honey Roasted Rhubarb with Malted Milk Custard

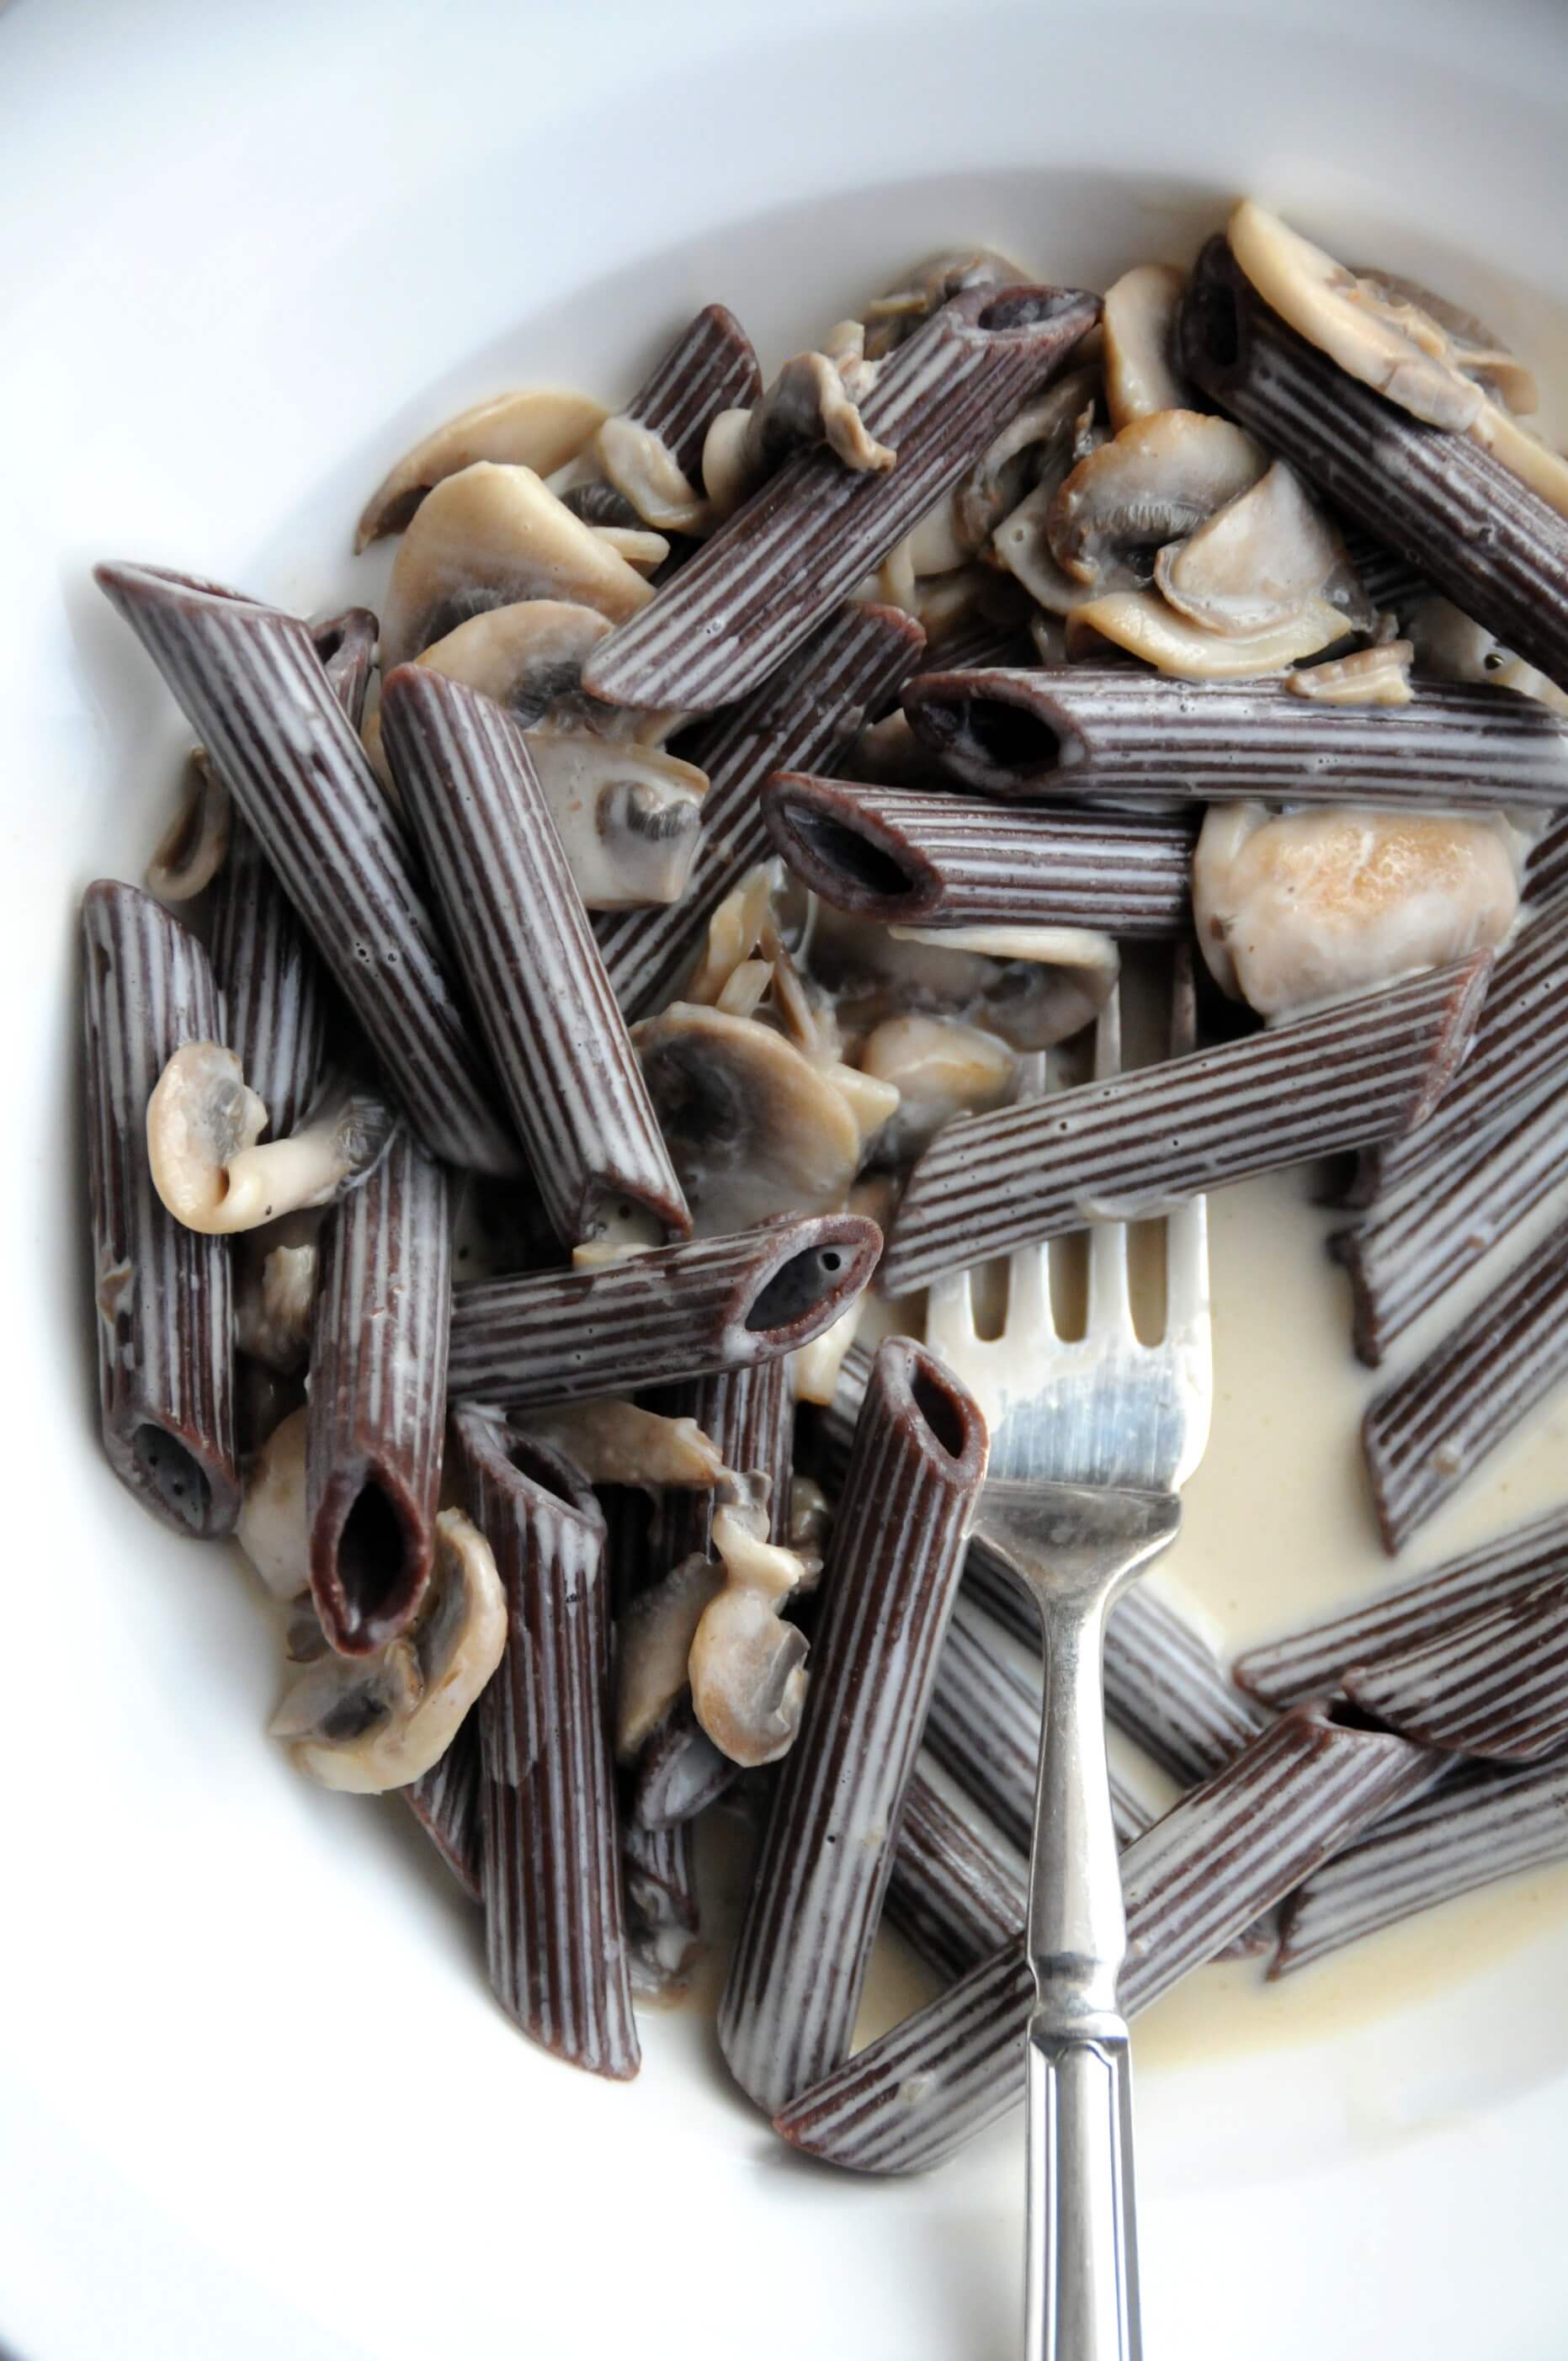
I’ve had something of an experimental morning in the kitchen, realising that I was running out of time to join in with a new blog event over at Kavey Eats called Bloggers Scream for Ice-Cream. The challenge is to make an ice-cream from scratch using a custard based ice-cream. Hmn, I’ve never made home made ice-cream and I don’t really think I’ve made custard from scratch. I know I’ve wanted to, especially when Sally was hosting the Custard Monthly Mingle over at My Custard Pie, but time ran out before I got the chance.  So, onto the custard ice-cream challenge instead.

In the process of deciding on flavours and looking for inspiration, I came across a recipe for Malt Chocolate Ice Cream on BBC Good Food, by Barney Dezmazery. Realising that you can flavour ice-cream with Horlicks, I was a convert. I didn’t want to go all out on the chocolate, so instead went for a creamier flavour, adding vanilla sugar instead of melted chocolate to the Horlicks. I also used Madagascan Vanilla Cream (from the supermarket) and added extra vanilla seeds to the custard. I used five large eggs yolks, instead of six and didn’t add the Irish cream liqueur.

In the process of doing this, I realised I’d made a beautiful creamy custard, ready to freeze.

Malted Milk Custard

I also had some fresh new season forced rhubarb to use up and since rhubarb and custard are a natural combination I decided to take out a cupful of the custard (kind of a cook’s treat!) before freezing it to pour over my simple honey roasted rhubarb. And this is how we ended up with Honey Roasted Rhubarb with Malted Milk Custard.

Honey Roasted Rhubarb and Custard!

The rest is now in the freezer and I have a bit more waiting and mixing to do, so part two of the experiment to make my first ever home made custard based ice-cream will have to wait to tomorrow.

We’re still battling the pox, so please excuse the quick snapping by camera phone. Clearly, it didn’t stop those cute little hands (with felt tip pen all over them today) from having a dip!

Sneaky Little Hands!

[gmc_recipe 2754]

As forced rhubarb is in season and baking it is very simple, I’m linking this up to Simple and in Season here on Fabulicious Food!

Forced Rhubarb: In Season Now!


Join me tomorrow for part two of the custard/ice-cream adventure! Will my no-churn ice-cream work?! It’s starting to look a little odd…

February 16, 2012

Warm Banana and Maple Syrup Pancakes with Cinnamon Cream

It’s half term and we’ve just got back from a wonderful couple of days in Bath. It’s a city I’ve never been to before and I thought it was absolutely stunning. I do have some photos and foodie tips to share, but as we’re a little pinched on time, I just wanted to share a quick recipe for yummy banana pancakes with maple syrup for the time being. This is a great way to use up bananas which are perhaps going a little bit brown or spotty, by the time they are slightly caramelized and wrapped up warm inside a pancake you’ll never know. We love pancakes with bananas! Of course, a little teaspoon of Nutella wouldn’t be out of place here either.  

You could serve these with either a plain whipped cream, or you can flavour it with a teaspoon of ground cinnamon, vanilla seeds or a teaspoon of orange zest before you whisk. If you are feeling extra decadent, pour a little melted chocolate sauce over it too.

Shrove Tuesday this year is creeping up and is on Tuesday 21st February. Hopefully I’ll have time to sneak in a couple of extra pancake posts!

There are a hundred pancake recipes out there, but I used this one for ‘Perfect Pancakes’ from BBC Good Food .

Warm Banana and Maple Syrup Pancakes with Cinnamon Cream

(serves 2)

Ingredients:

2-3 bananas, peeled and sliced (spotty bananas are fine!)
1 tablespoon sugar
Large knob of unsalted butter
Good splash of maple syrup

150 ml double or whipping cream
Teaspoon ground cinnamon

2-4 thin pancakes or crepes such as these

Method

Melt the sugar and butter in a frying pan and place the sliced bananas in without over crowding the pan. Cook for a minute or so on each side (until golden) and carefully flip over. Add a splash of maple syrup which should make a nice sauce.

Whisk the double cream or whipping cream with a teaspoon of ground cinnamon.

Re-heat a few pre-made pancakes (or just keep them warm if you’re making them fresh.)

Put your bananas inside the pancake, roll up and dollop over some of your whipped cream. 

A quick chocolate sauce

100 g milk or dark chocolate (Fair Trade if possible)
2 tablespoons double cream

Melt the chocolate and cream in a bowl over a pan of hot water (make sure the bowl doesn’t touch the water and keep stirring.) Use to top pancakes.

I’m sending this across to Kate at Turquoise Lemons for her No Waste Food Challenge. This month, Kate challenged us to use up leftover spotty bananas!

Picture 

What will you be filling your pancakes with this year?! 

January 20, 2012

Nutella Bread Pudding with Leftover Christmas Panettone

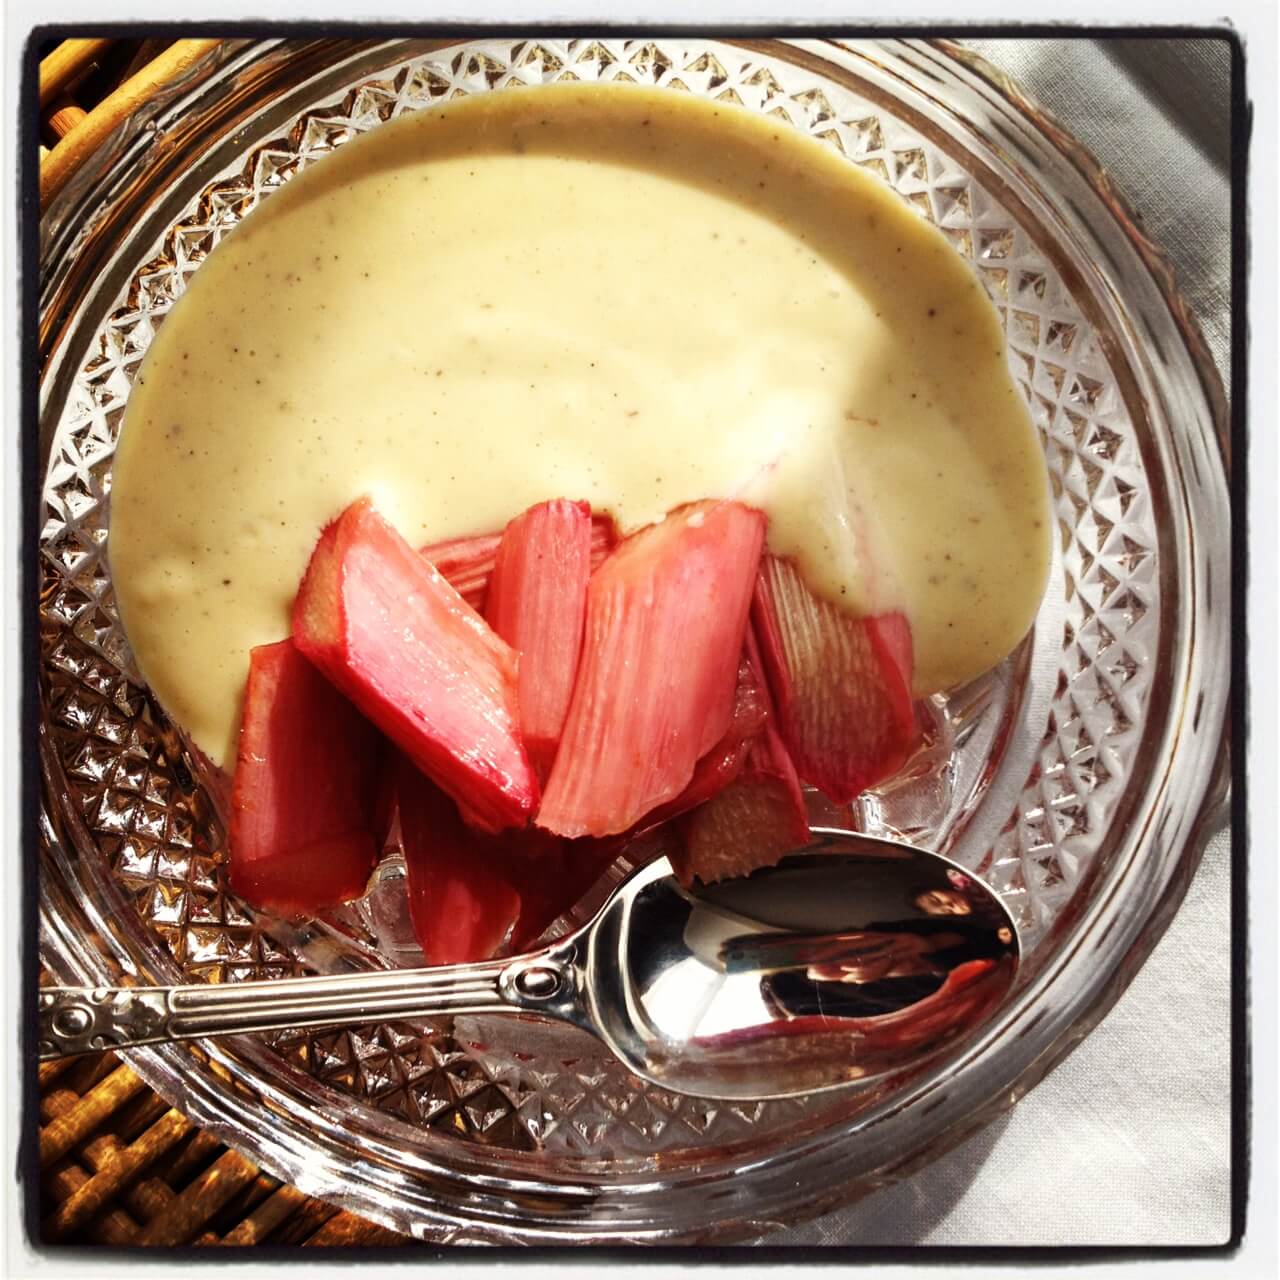
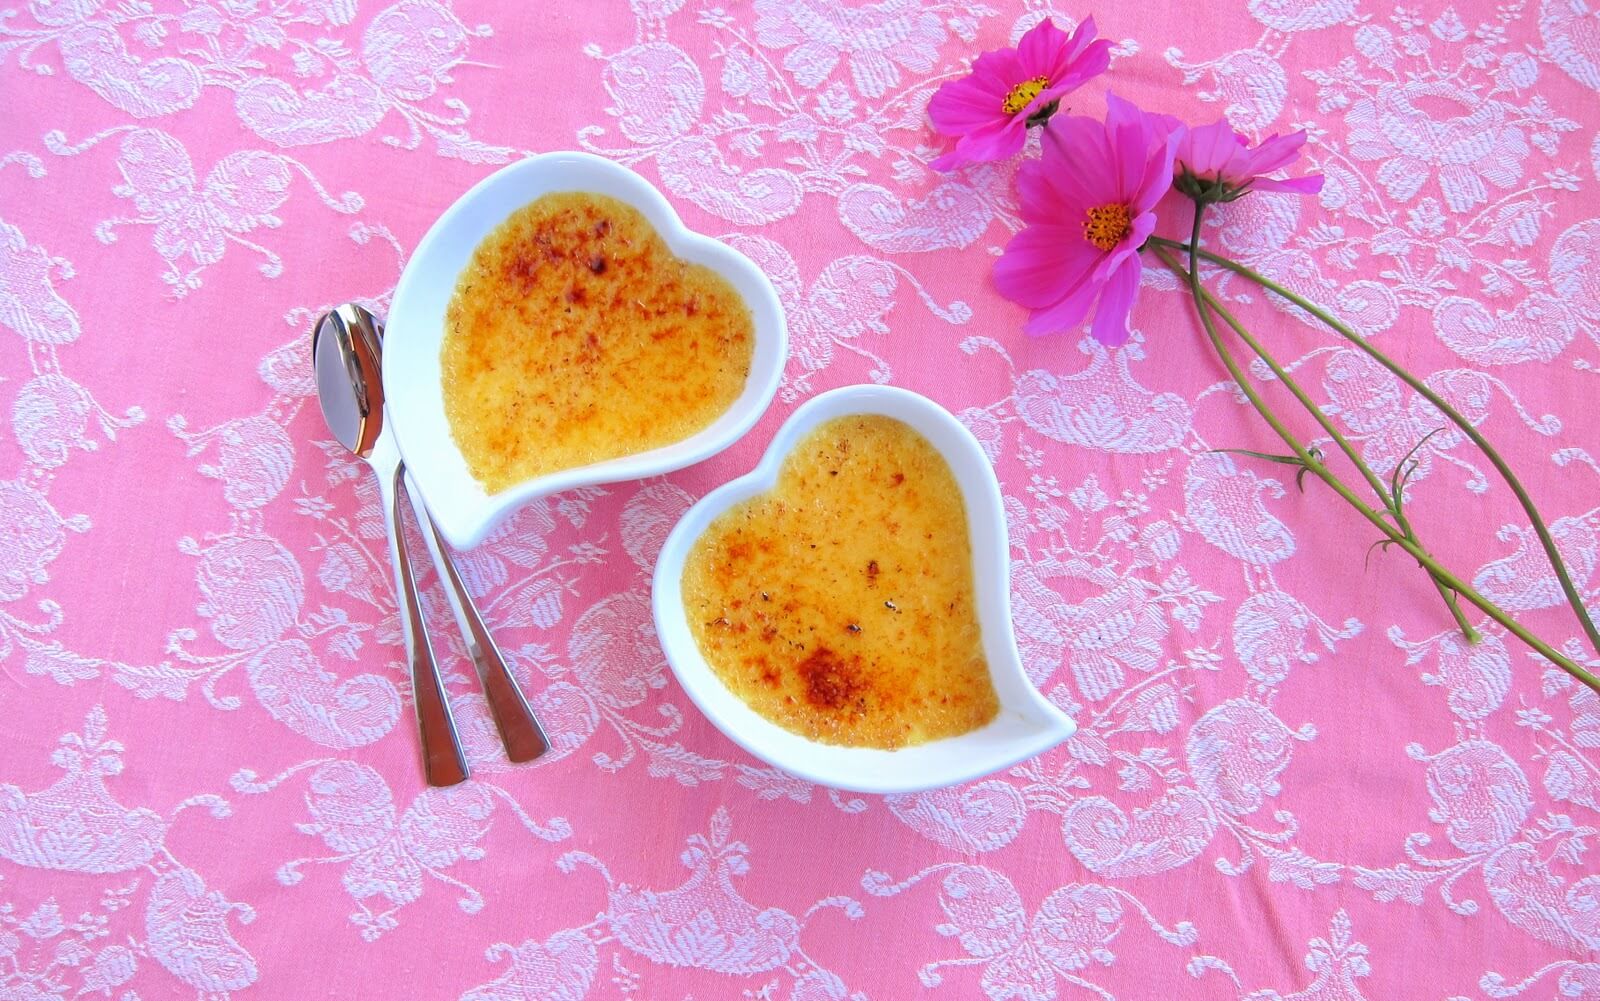
I’m stuck in that very precarious zone of trying to be healthy and good because it’s January and having lots of Christmas treats leftover to get through…what a quandary! The boxes of chocolates have been left well alone, but there was a beautifully wrapped Italian panettone lurking in the cupboard and I really can’t go on eating it every day for breakfast, dipped into a milky coffee, as much as this appeals. We always get at least two boxes of panettone for Christmas. The first one, a delicious chocolate specimen, got demolished almost as soon as it came through the door. The second one survived a little longer. So, when I came across a quick and easy to make bread pudding in Nigella’s Kitchen, using stale bread and chocolate chips, I thought the pannetone would make the perfect substitute and since it was sitting quietly next to the Nutella….   

On the positive side, I used half fat double cream (also leftover and only 10p!) and less sugar….

[gmc_recipe 2255]

I’m linking this up with January’s Forever Nigella #10 over at Maison Cupcake hosted by Sarah…we were allowed to blog any Nigella recipe.

Also sending this across to the No Waste Food Challenge over at Turquiose Lemons hosted by Kate. The theme was cream.

Picture

And lastly, as it’s ‘family friendly’ and it’s Friday it gets to join Family Friendly Fridays…

What have you been eating? Healthy or not so healthy?!

January 12, 2012

Pressure Cooking: Crema Catalana (Spain’s Creme Brulee) by Laura Pazzaglia

Yesterday we had a fabulous guest post and introduction to pressure cooking by Laura from Hip Pressure Cooking. I was particularly surprised to learn that there are many different cooking methods that you can adopt when using your pressure cooker, such as braising, stewing and steam roasting. So, it’s not all about watery stews and scary noises!

This recipe in particular however, using the bain marie method, really intruiged me. Wouldn’t these be perfect to make for Valentine’s Day? Or just any day really…

Crema Catalana (Pressure Cooked)

As well as sharing her recipe, Laura has also put together this step-by-step photo collage (which I’m slightly in love with) making the process really easy to follow. If you do follow the trend and start pressure cooking yourself, don’t forget to let us know!

Photographs and recipes are the property of hippressurecooking.com and re-published with permission.
Many thanks to Laura for her guest post and for today’s recipe. Come back tomorrow for a quick and easy pressure cooked pasta dish!
Have you ever tried cooking using a pressure cooker? Have you had any triumphs or disasters?!

February 2, 2011

Chocolate, Beetroot, Vanilla & Black Pepper Cupcakes (Prepped!)

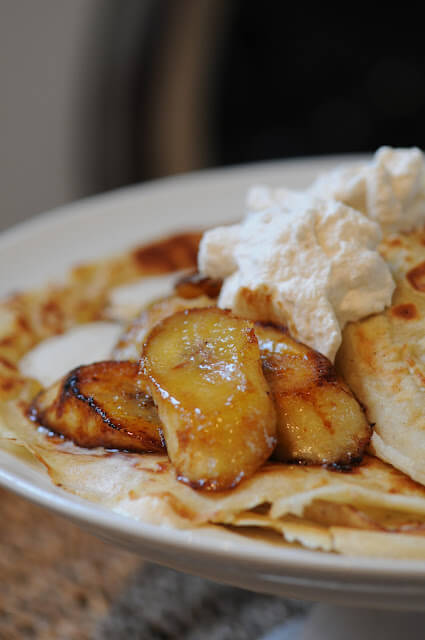
A little while ago I posted about my adventures in recipe testing, which involved making and tasting some amazing pancakes for a wonderful foodie, Vanessa Kimbell, who is currently writing her first cookery book, Prepped! (Check out my new pink badge to the right, too!)

It was a great privilege for me, as a newbie food blogger, to join Team Prepped! – Vanessa’s brigade of on-line recipe testers. I was even more delighted this weekend about testing another one of Vanessa’s inspired recipes, Chocolate, Vanilla and Black Pepper Cupcakes.

My initial impression of the recipe was that it involved some pretty unique flavour combinations. Though I have to say, having been introduced to many of Vanessa’s recipes to date via the wonderful online community of food bloggers, I wouldn’t expect anything less.

These cupcakes were a real treat for me to try, since I love baking cupcakes and the more cakes for me to try the better.  Vanessa’s recipe called for cocoa (the chocolate element) with a whipped cream, vanilla and black pepper filling.  Vanessa also had one more trick up her sleeve, grated, cooked beetroot in the cake mix to give it some extra oomph. I have to say, this was a first for me, but I’m willing to try anything (within reason!)

And so, with an open mind, I set about testing the recipe. There was no butter or margarine involved (which surely has to be a good thing?) Instead, the recipe calls for rapeseed oil  (otherwise known as the British alternative to olive oil) which happens to be lower in saturated fats than olive oil or sunflower oil.

Cocoa, beetroot, rapeseed oil…were these cupcakes starting to sound healthy?!

The mixture came together very easily and Vanessa’s recipe was spot-on, except for the fact that I added a little more prep time owing to the fact that you have to drain and grate the cooked beetroot.

I used a re-usable piping bag to fill my cupcake cases, a little tip I picked up on a cupcake course, as you end up with a more even batch of cupcakes. You could also use an ice-cream scoop for the same purpose. I filled my cases two-thirds full and found that the mixture was enough to make 18 good-sized cupcakes.

The only down-side I found with this recipe is that you can’t really lick the bowl. Somehow, and strangely, it was the bicarbonate of soda I could taste rather than the beetroot and I found the raw mixture to be a bit irony. That being said, licking the bowl, whilst a cook’s perk, is not the final product, so I remained of an open mind.

After twenty minutes, I took out a perfectly risen, rich and deep in colour, bouncy batch of chocolate cupcakes. Each one was a little thing of beauty and they smelt divine. I couldn’t wait to try them and devoured one as soon as I could get it out of its case without burning my fingers.  It was, without any doubt, delicious – crumbly, moist, chocolaty, almost melt-in-the-mouth and that was before the cream-fest!

To fill them, Vanessa instructed me to cut a piece out of the centre of each cupcake and fill it with the whipped cream, vanilla and black pepper mixture. This was really easy to do although again I added a little extra prep time in case you have to whisk by hand.  The whipped cream filling made a lovely alternative the plumes of smoke that mixing huge quantities of icing sugar and butter so often produces in my kitchen.

I would say that the vanilla and black pepper provided a lovely background flavour, nothing too overpowering. I think I could have gone for a few more twists of the pepper grinder.  The beetroot in the cake mix, to my taste, could hardly, if at all, be detected (not even by my husband, who has a particularly acute radar and total aversion for ‘earthy beetroot’ content in any food.)

The very best thing about these cupcakes is that they seemed to get better by the hour (yes, I was sampling them by the hour) and the next day they were as good if not better having been kept in a airtight contained. I was surprised that there were any left, but they were still amazing on Sunday, particularly for breakfast.

Try them! I urge you, you’ll be converted.  Plus, if you ignore the whipped cream filling, they ARE healthy!

Thank you, Vanessa, for letting me test this recipe for you, it was a delight.  I can’t wait for Prepped! to be published, not least because the book has been written specifically with the ‘time-short foodie’ in mind (which is definitely me!) but more so because if the posts by fellow Team Prepped! members are anything to go by, Vanessa’s book is going to be full to the brim with tasty, imaginative and creatively influenced recipes THAT WORK!

Chocolate, Vanilla & Black Pepper Cupcakes

Printed with permission of Vanessa Kimbell
Prep time 25 minutes for the cakes & 15 minutes for decoration
Cooking time 20 minutes
Suitable for freezing? Yes, before decorating
Ingredients
For the cupcakes
225g self-raising flour
75g cocoa powder
280g caster sugar
1 tsp bicarbonate of soda
3 eggs
150ml rapeseed oil
300g cooked beetroot, grated and drained
For the Filling
450mlm fresh double cream
4 tbs icing sugar
About 20 grinds of fine Black pepper or a level tsp
2tsp vanilla essence
To decorate about 25g of chocolate shavings
Method
1 Preheat the oven to 170˚C/gas mark 4.
2 Sift all the dry ingredients for the cake into a bowl.
3 In a separate bowl place the 3 eggs and whisk.  Add the oil and beetroot.
4 Add the dry mixture to the wet ingredients. Mix well.
5 Line a muffin tin and divide the mixture among 18 large cupcake papers/muffin paper cases. Bake for 20 minutes, or until they have risen and spring back into shape if touched.
6 Leave to cool completely on a wire rack.
7 Whip the cream, icing sugar, vanilla essence and black pepper together until thick – careful not to over do the pepper, I suggest grinding some in then tasting until you are happy with the balance.
8. Gently cut a piece out of the centre of each cupcake to make a ‘hat’, then slice in half.  Fill the hole with the cream and pop the top back on the make wings.
9 Scatter with chocolate shavings and serve. If you are not eating straight away these will keep in an airtight container until the use by date of your cream.
Vanessa is at the final editing-stages of her book “Prepped!: Gorgeous Food without the Slog – a Multi-tasking Masterpiece for Time-short Foodies” which is due to be published in May 2011 and is available now for pre-order on Amazon Prepped!

December 19, 2010

Christmas Tiramisu Trifle

There’s something about Christmas that makes me want to eat cinnamon and ginger and basically anything sweet.  This week, I happened to be looking for some inspiration for a dish that I could take along to a pot-luck ‘Crimble’ party.

I have a huge trifle bowl from Pampered Chef, which rarely makes an appearance, but I decided that whatever came along with me to the party, this bowl would be filled with something very tasty indeed.

Torn between making a Tiramisu or a trifle, I let the ingredients in my cupboard dictate. I didn’t have any savoiardi/sponge finger biscuits, but what I did have was a couple of packets of ginger snap biscuits (the ones you would usually dunk in a cup of tea or coffee) and a dark and sultry bottle of Tia Maria on my shelf and so my little brain began to tick.

It’s always a little bit dangerous to try and mess around with a classic, particularly an Italian institution such as Tiramisu.  A quick search on the Internet (to see whether I was really crazy) revealed some interesting variations.  There was a Nigella version which called for Baileys Irish Cream and in her new book, Kitchen, she uses Frangelico, a hazelnut liqueur. 

What really grabbed my attention was an Italian menu I came across offering a “Tiramisu di Natale” for dessert.   It was described as being made with ginger biscuits, pears and liqueur.  It didn’t say which liqueur and in fact, the truly authentic Italian version would call for Marsala, a sweet wine, a bit like a sweet sherry.  Sadly, the menu was old, so I couldn’t call for a recipe. 

Undeterred, I set aboutmaking my own creation. I didn’t use pears (since my friend Chris is fruit-averse) but I’m sure the recipe would work really well with either poached pears or else tinned pears chopped up and added to each layer. You could also try using Ginger Cake instead of biscuits and perhaps Ginger Wine instead of Tia Maria.

My monstrous creation could easily serve 8-10 people, if not more.  Having been chilled in the fridge overnight, on the pot-luck evening it served myself, Monika and Chris with a smidgen left over for our hubbies.  We were firmly in the “lifetime on the hips” territory but it was well worth it.  We promised Chris we’d join her running club in the New Year to compensate!

Please give this one a go over Christmas, or serve it at a New year’s Eve party and let me know how you get on. It may not be authentic in terms of its ingredients, but it is made to a traditional method shown to me by my Italian brother-in-law, Alberto, many years ago. It is also light set, rather than being firm, since it has half the amount of Mascarpone and uses double cream, but its gooey nature truly means it melts in your mouth with an explosion of Christmassy flavour.

You won’t be disappointed!

PS Since this recipe calls for raw eggs and liqueuer it is unfortunately not suitable for kiddies or pregnant ladies.


Christmas Tiramisu with Ginger Biscuits, Cinnamon & Tia Maria


Ingredients:


6 large free-range eggs – yolks and whites separated

200g caster sugar

1 tablespoon cinnamon powder

250g tub Mascarpone (Italian cream cheese)

250 ml double cream

250ml espresso coffee

250 ml Tia Maria (or other liqueur of your choice)

2 packets Ginger Snap Biscuits or Ginger Cake

100 g Grated White chocolate for sprinkling on top

and/or edible glitter from a cake shop


You will also need four large bowls and a large trifle dish or bowl


The ingredients will combine better at room temperature.


Method:


In your first bowl, whisk the eggs yolks and caster sugar together with an electric whisk for around 7 minutes until the mixture is pale and fluffy. Add your tablespoon of cinnamon and mix again.  Then add in the tub of Mascarpone and mix until there are no lumps. 


In your second bowl, whip the double cream until it is quite firm but not over-whipped – around the soft peak stage.  Fold your whipped cream into the egg and Mascaprone mixture. 


In your third bowl and with a clean whisk, beat your egg whites until soft peaks form when the whisk is removed.  With a metal spoon, fold the egg whites into your egg, Mascarpone and cream mixture.


Now you are ready to assemble.


In your fourth bowl, combine the espresso coffee and Tia Maria (the coffee can be slightly warm).


Spoon a small amount of your creamy mixture into the bottom of your trifle bowl.


Dip your ginger biscuits or cake into the coffee and liqueur mixture and arrange on top of the creamy mixture to make your first layer.  It is better to soak a few biscuits at a time as you need them otherwise they will go too soggy to handle.


Then spoon some more creamy mixture on top and repeat the process of layering.  If you are using fruit, spoon this on top of the biscuits or cake.


Keep layering until you have used all the mixture. Since I was using a glass trifle bowl. I layered some of the biscuits around the edge of the bowl rather than flat so that you can seem them.  If you run out of coffee and liqueur mixture make up a bit more – it really depends on how much of the liquid your biscuits are soaking up!


Cover and chill in the fridge for at least 24 hours.  This will set the mixture slightly but it will still be quite loose so it is better to serve this in a bowl.


Grate some white chocolate over the top and dust with edible glitter for a real ‘Chistmassy’ finish.


Wishing you all a Merry Christmas and thank you so much for reading my blog! There are lot’s more recipes and posts planned for the New Year.


Primary Sidebar

Posts by email!

Subscribe now to get new posts direct to your email inbox

Search the site

Follow me on Instagram!

340,000+ Pinterest Followers – RenBehanFood

Visit Ren Behan Food's profile on Pinterest.

Archives

Footer

Copyright © 2023 Ren Behan · Custom Theme by Moonsteam Design

Copyright © 2023 · Ren Behan Custom Theme by Moonsteam Design on Genesis Framework · WordPress · Log in