Polish Easter Babka
A traditional, yeasted, Polish Easter Babka cake – Babka Wielkanocna Jump straight to the recipe I have always found Easter…
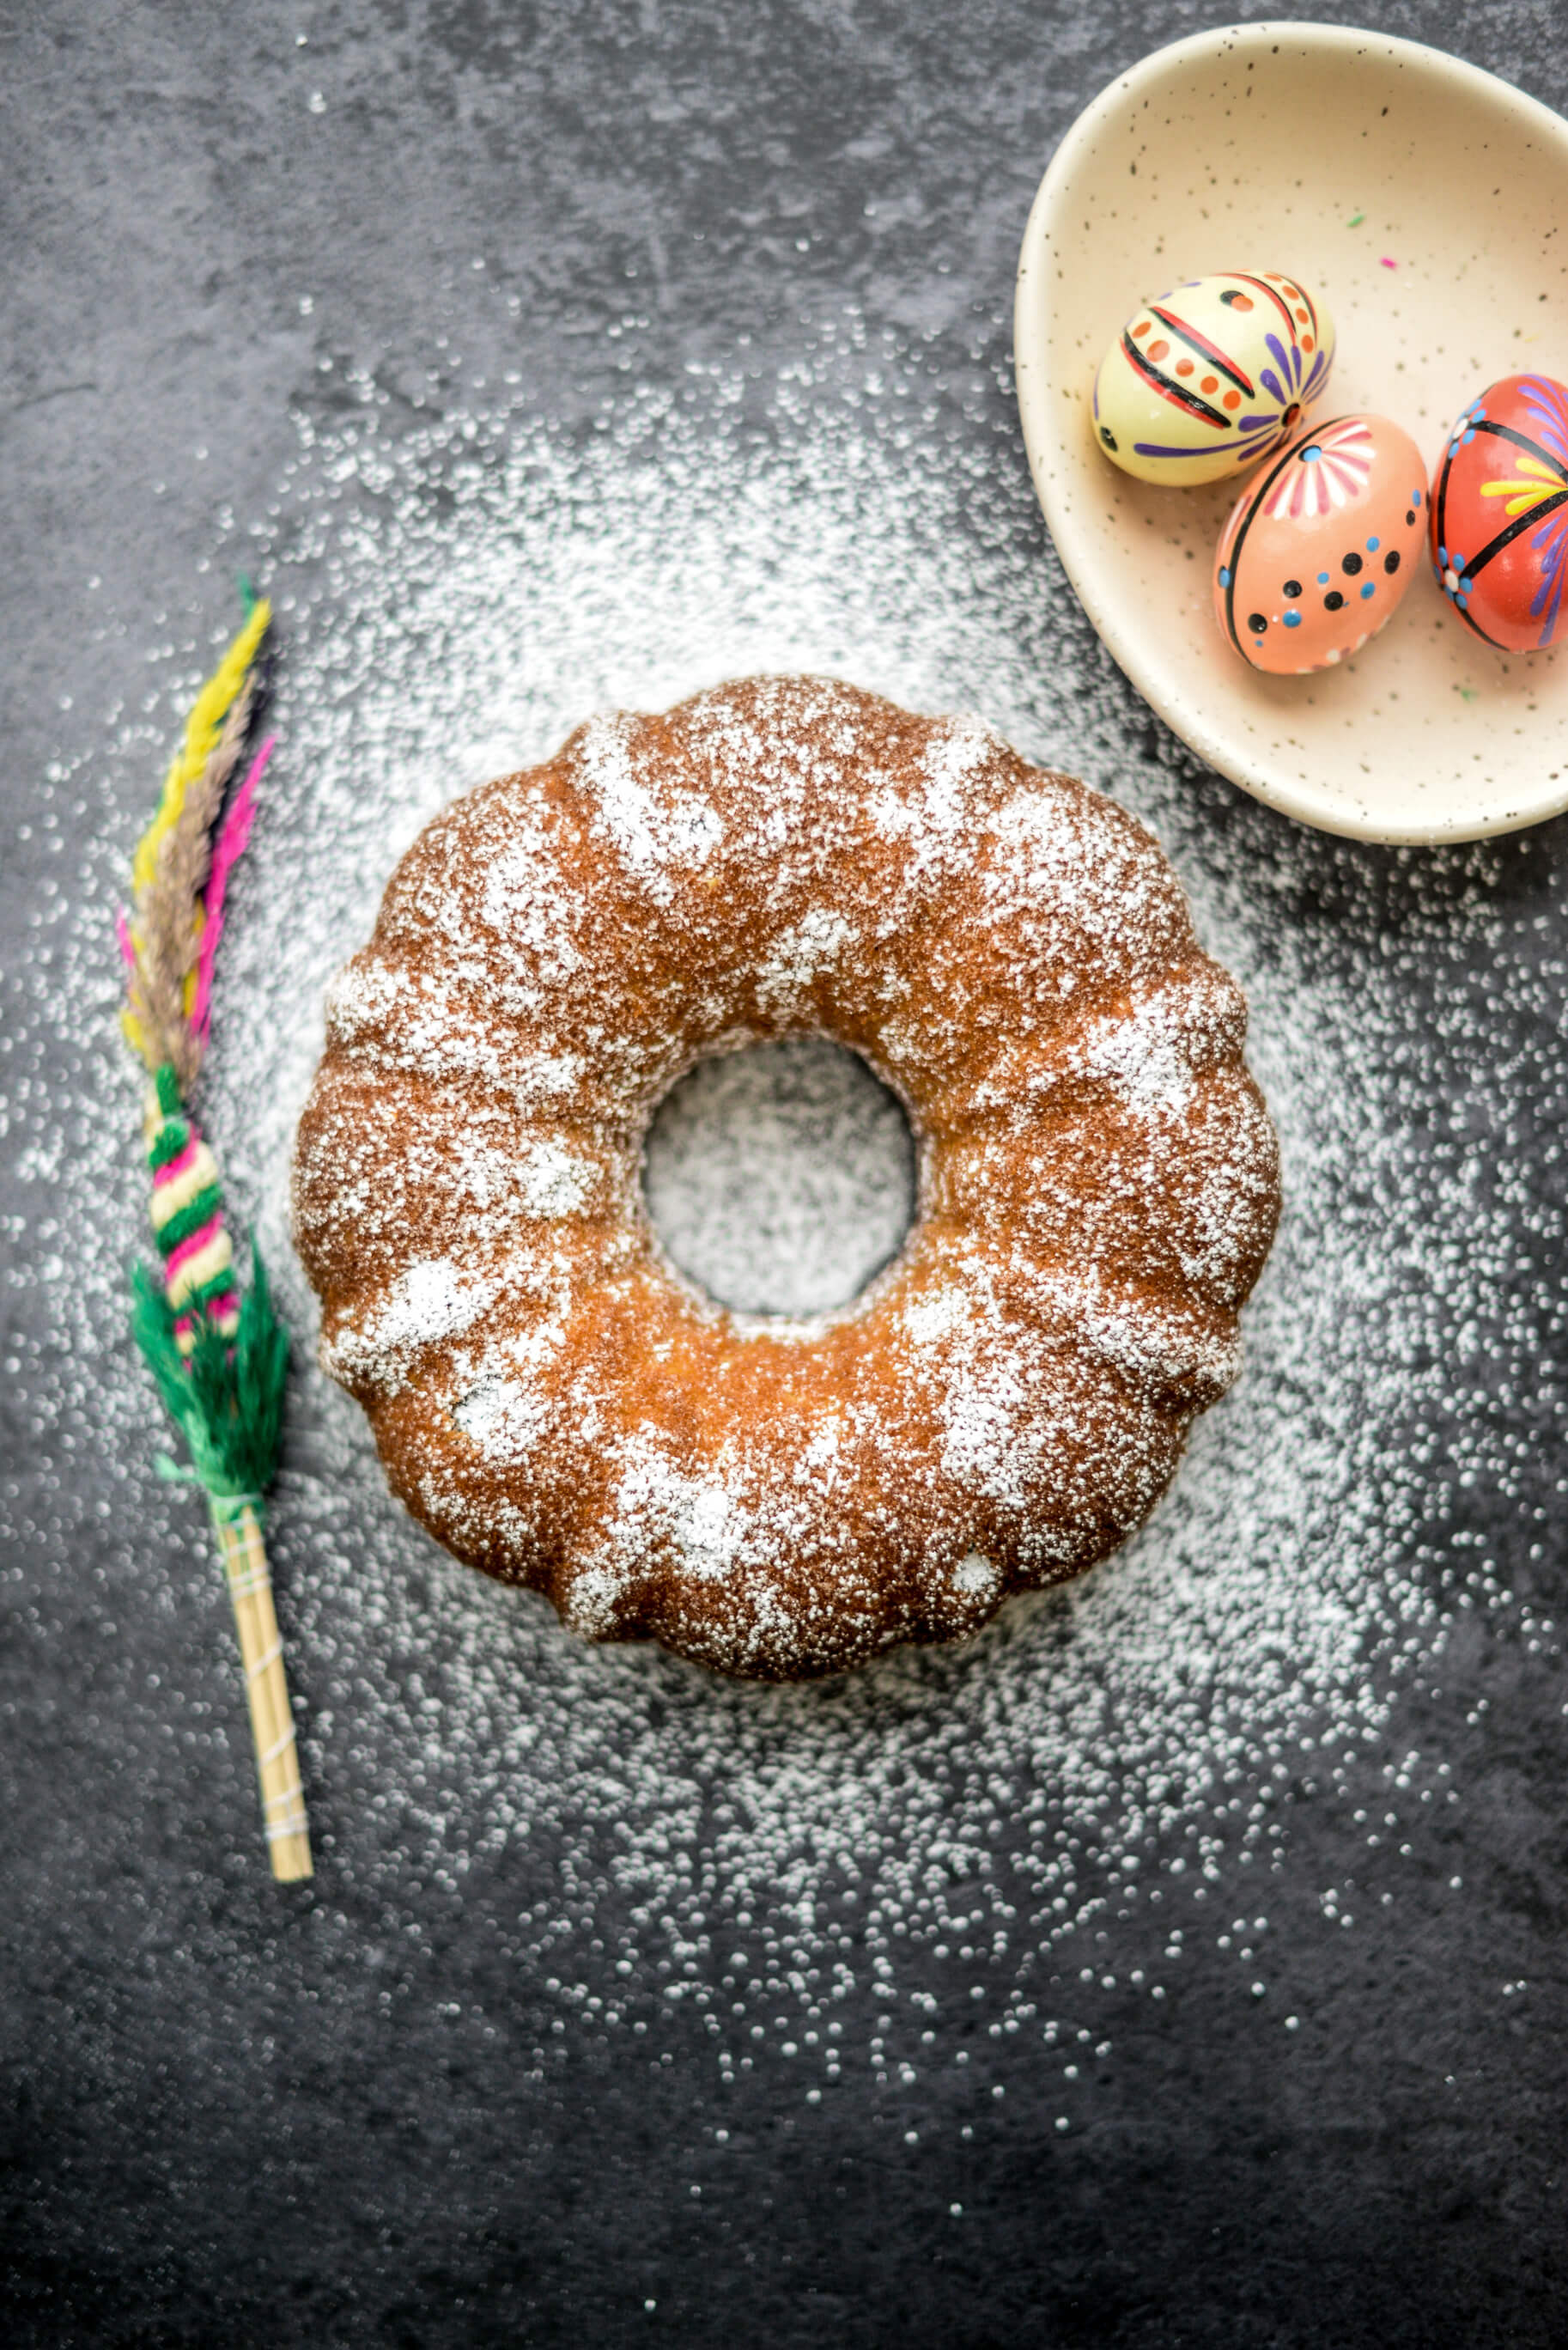
A traditional, yeasted, Polish Easter Babka cake – Babka Wielkanocna Jump straight to the recipe I have always found Easter…
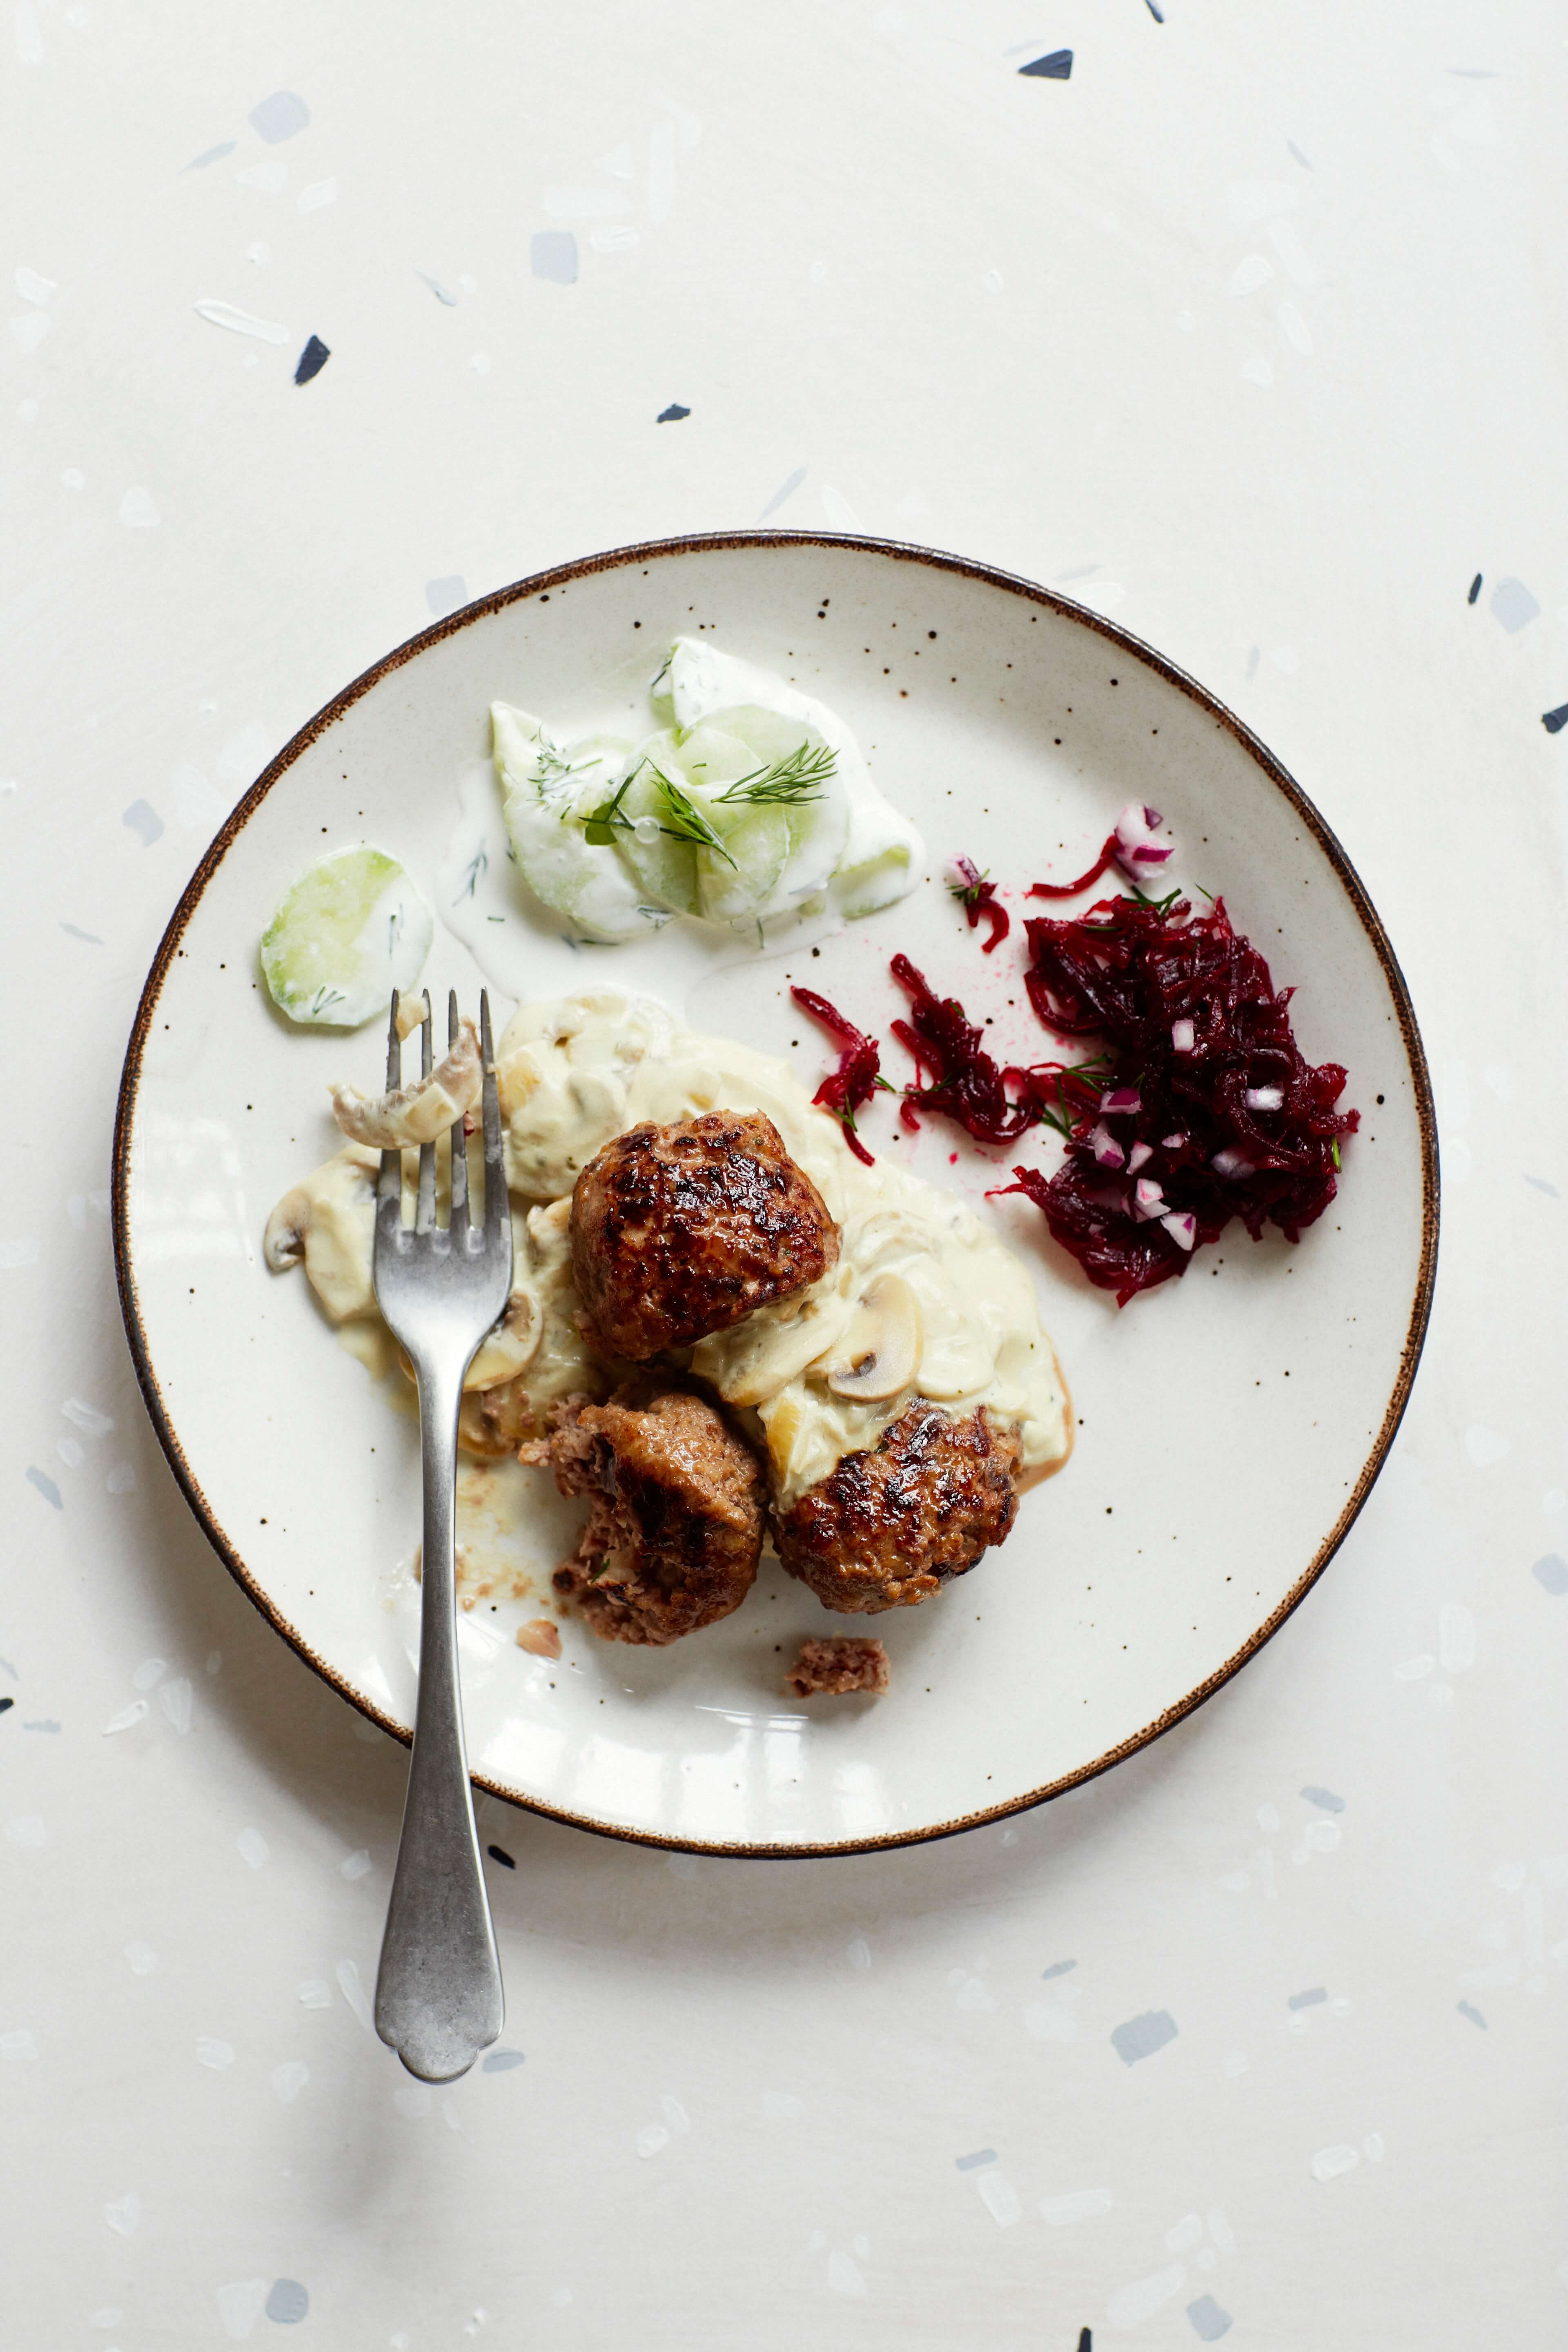
This is one of my favourite recipes from my cookbook Wild Honey and Rye for Polish Meatballs in a Mushroom…
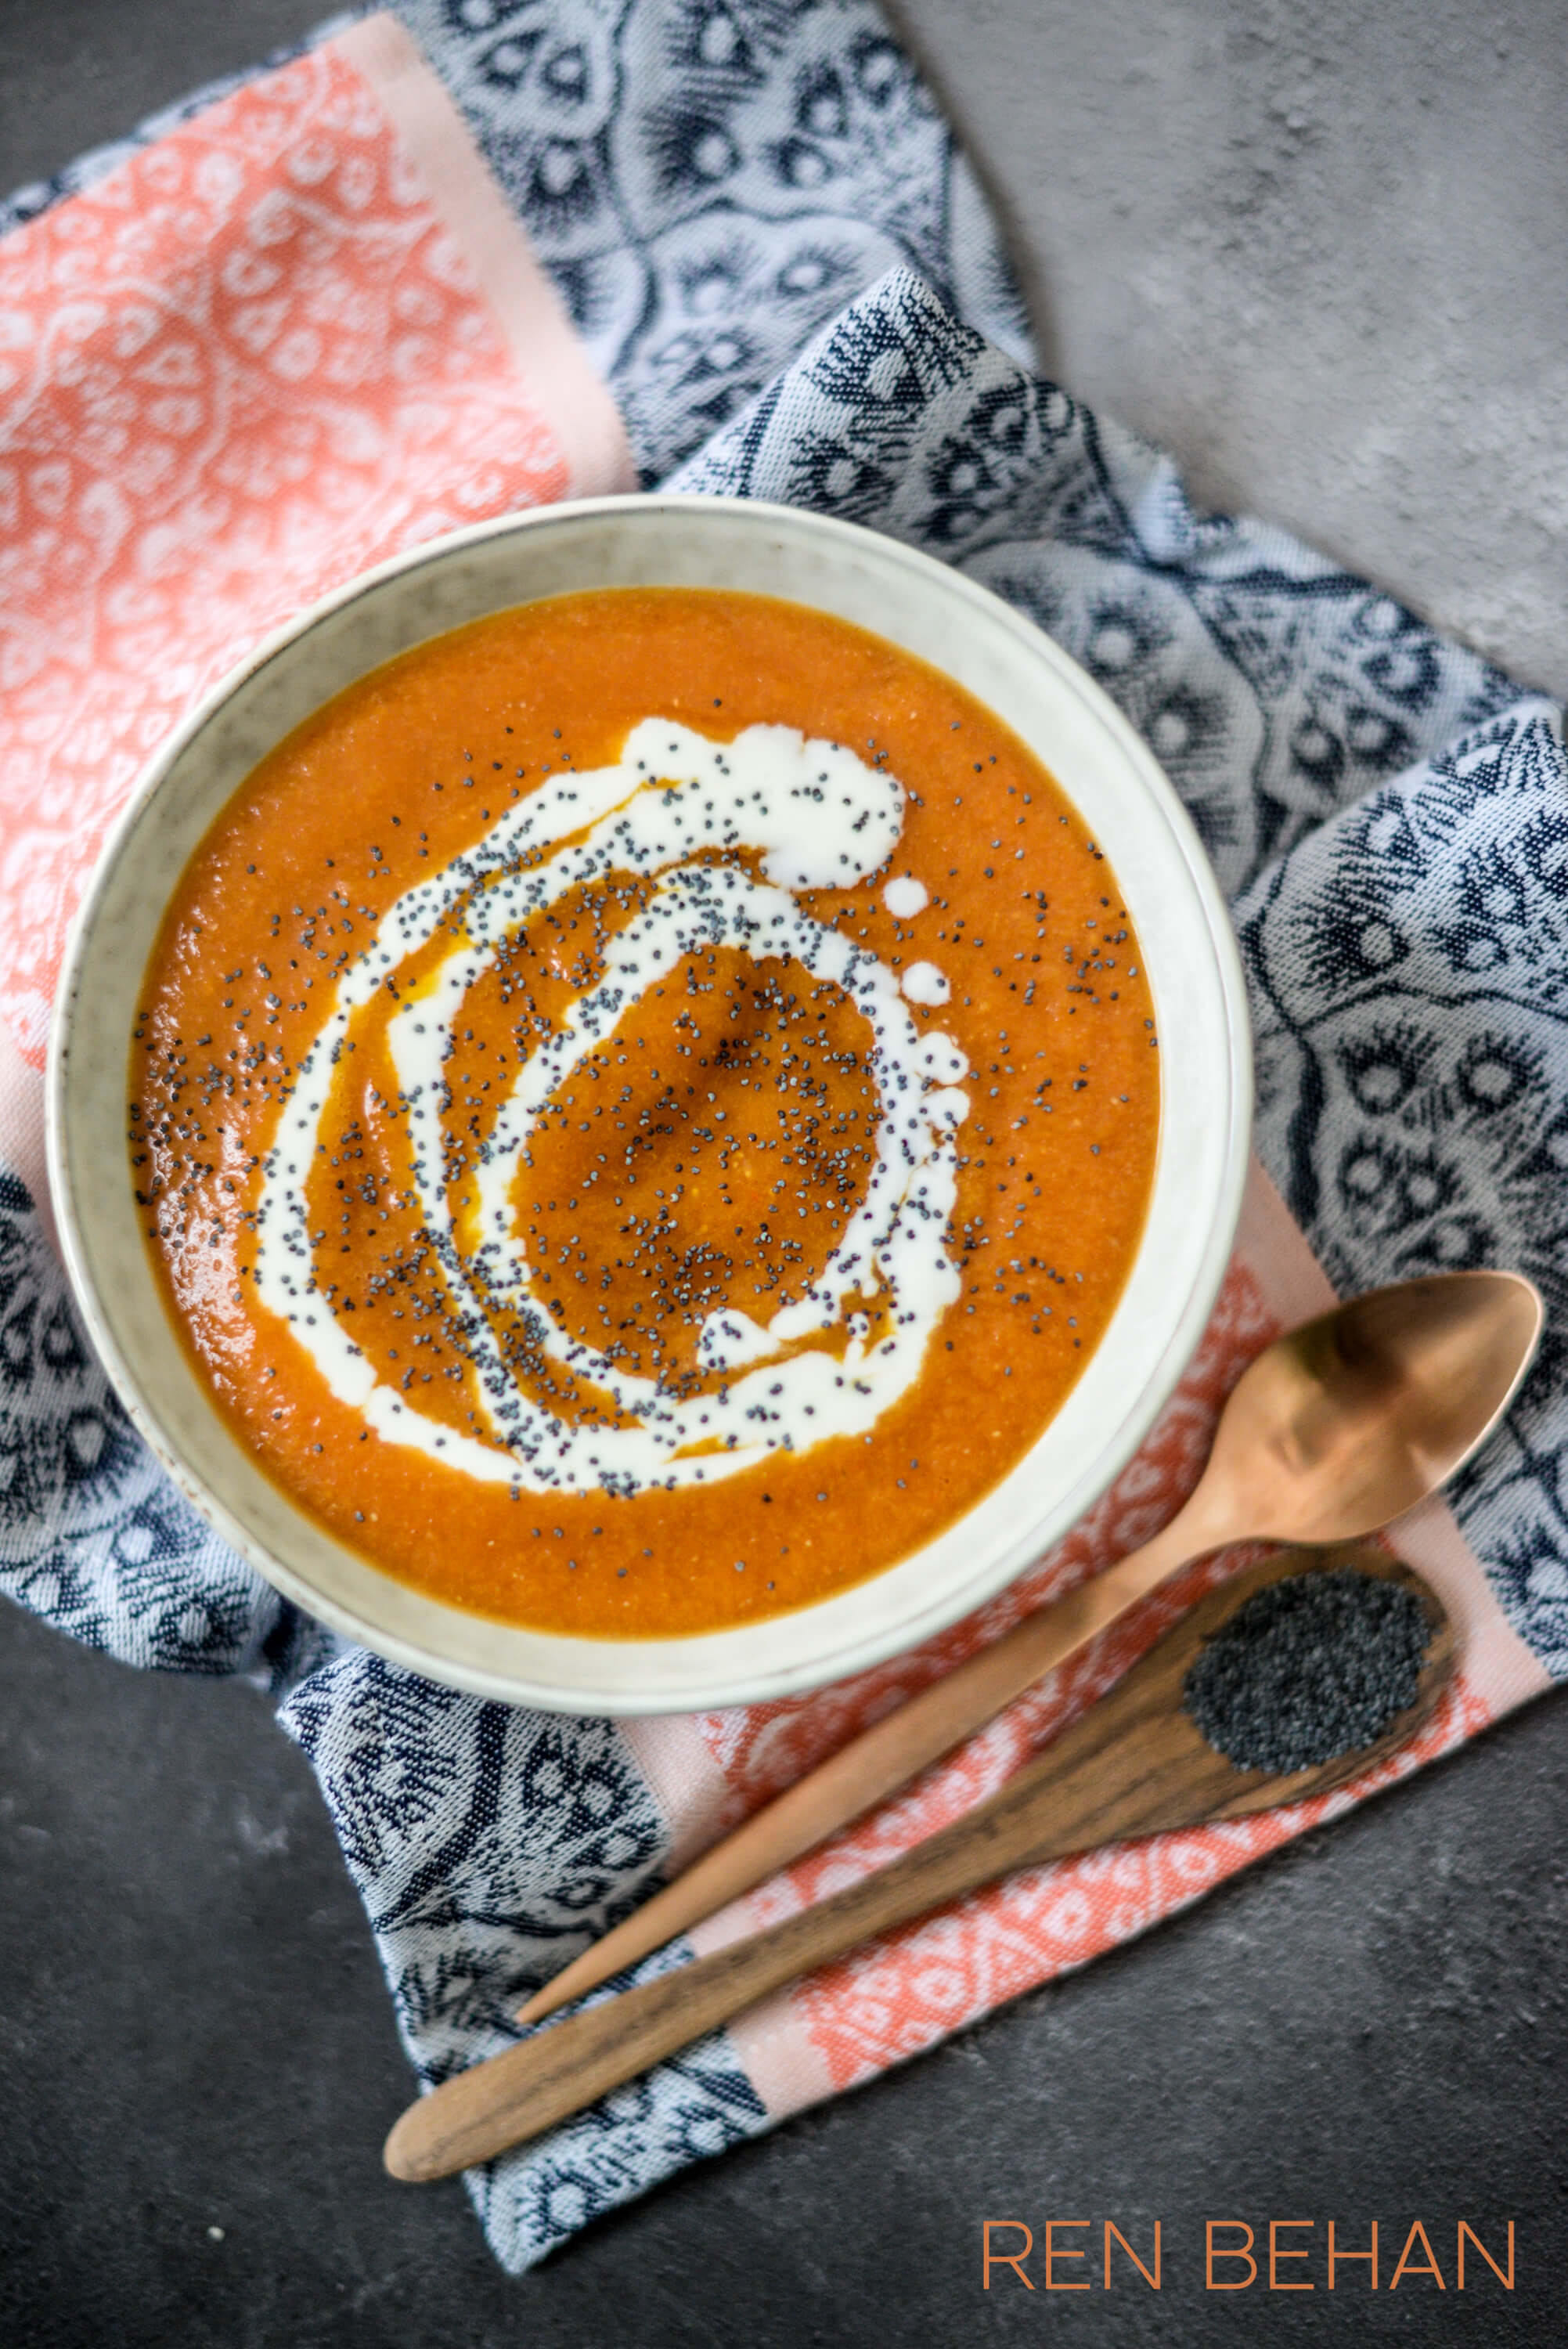
You can make this soup with fresh pumpkin, or butternut squash. Kefir is a gut-friendly dairy produce, but you can…
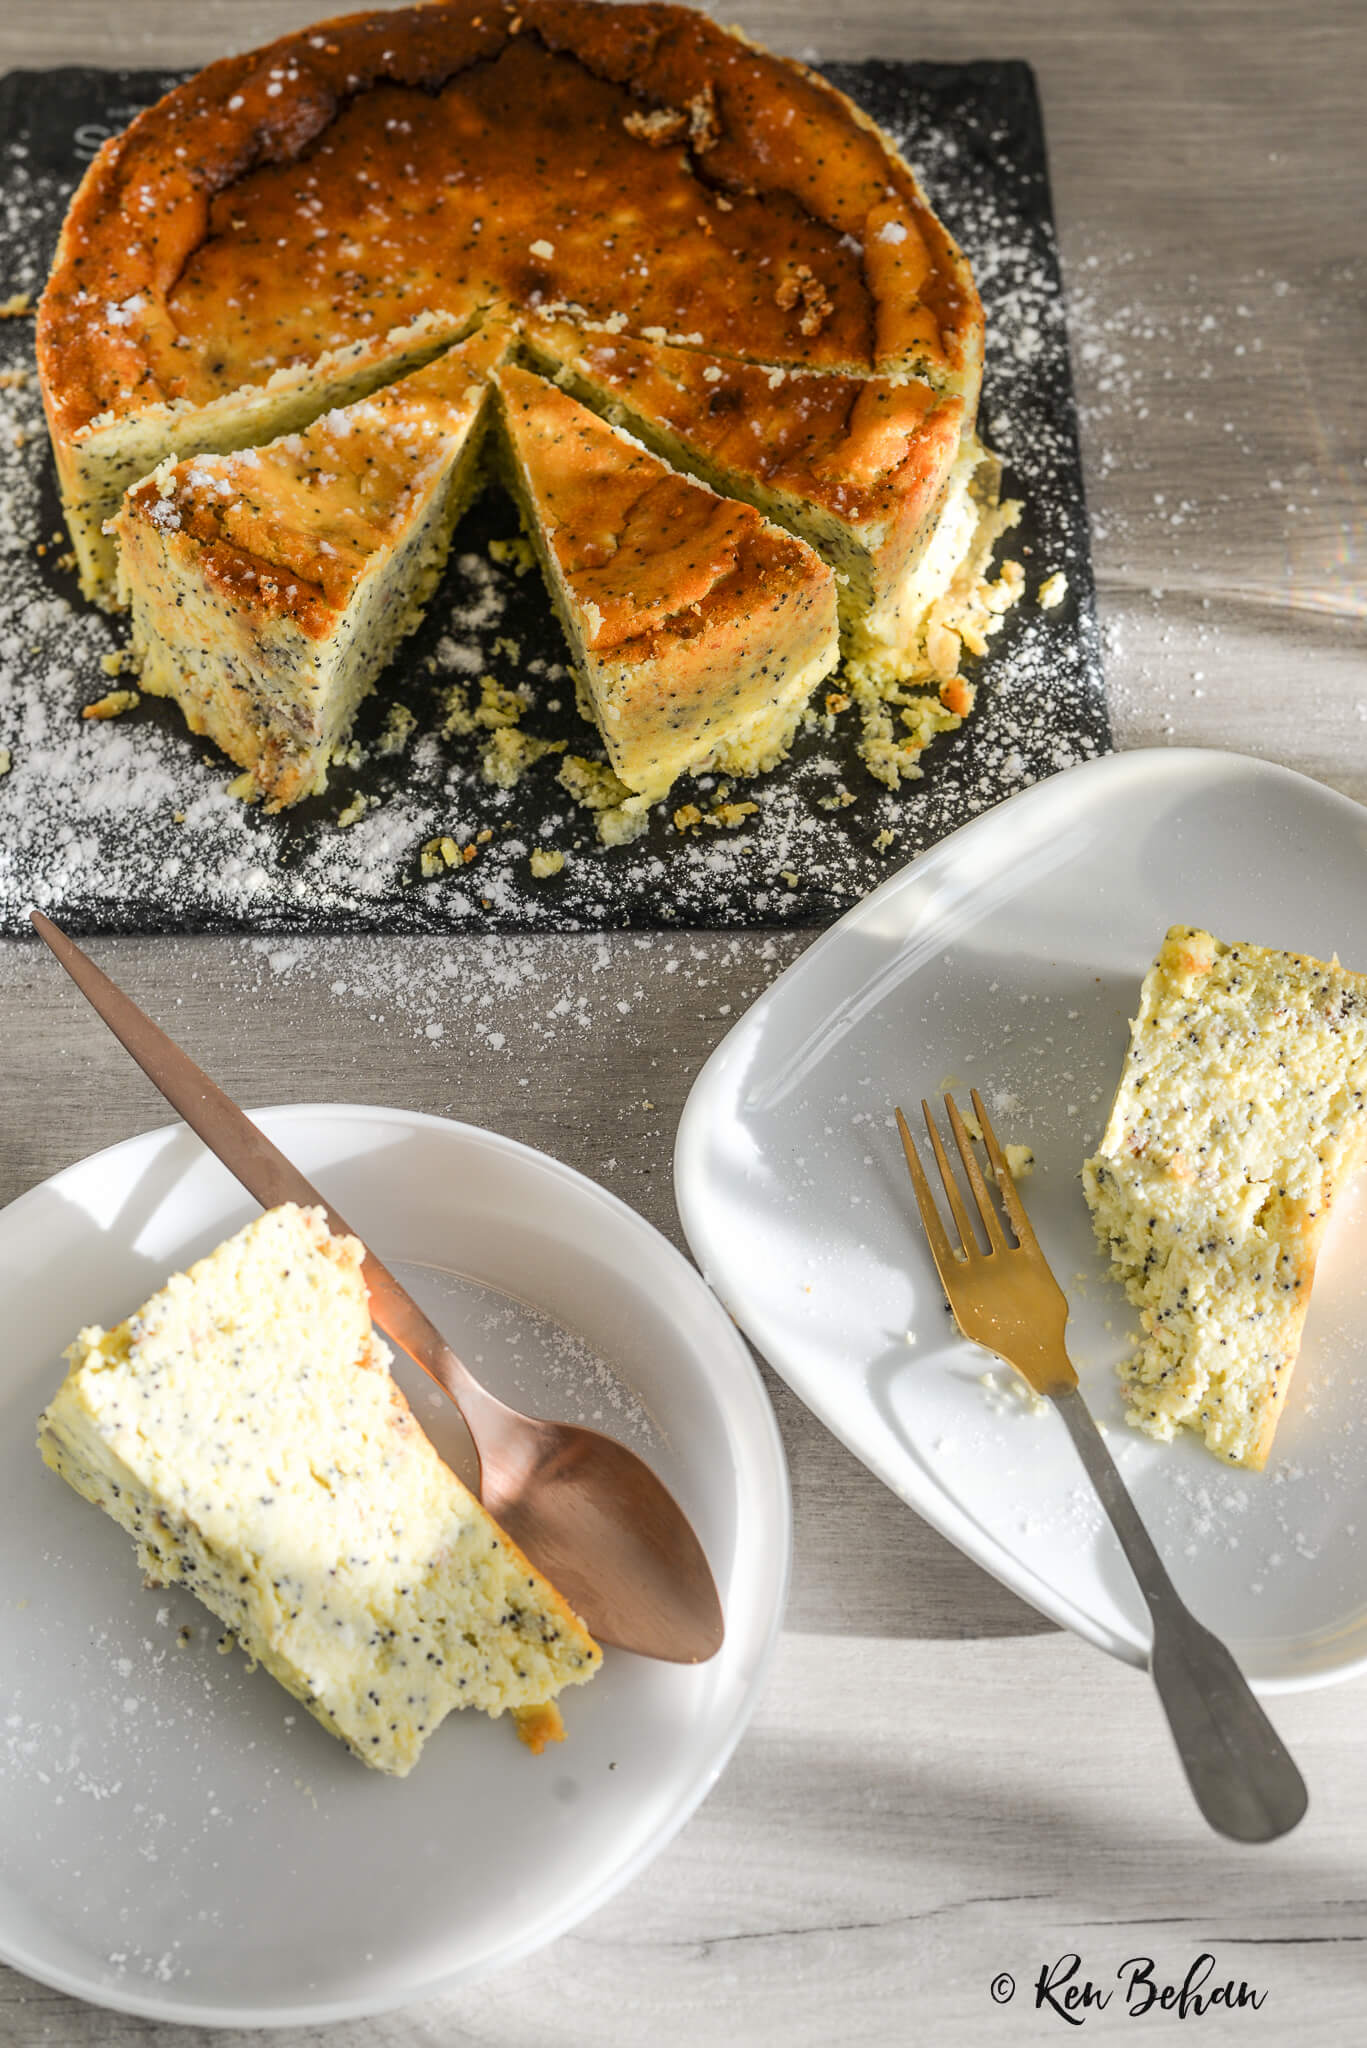
A light and airy baked cheesecake, perfect with a cup of lemon tea . Lemon, Rose and Poppy Seed Baked…
Happy New Year! I’m back. I’ve indulged in a long break. In fact, the longer I took, the harder it…
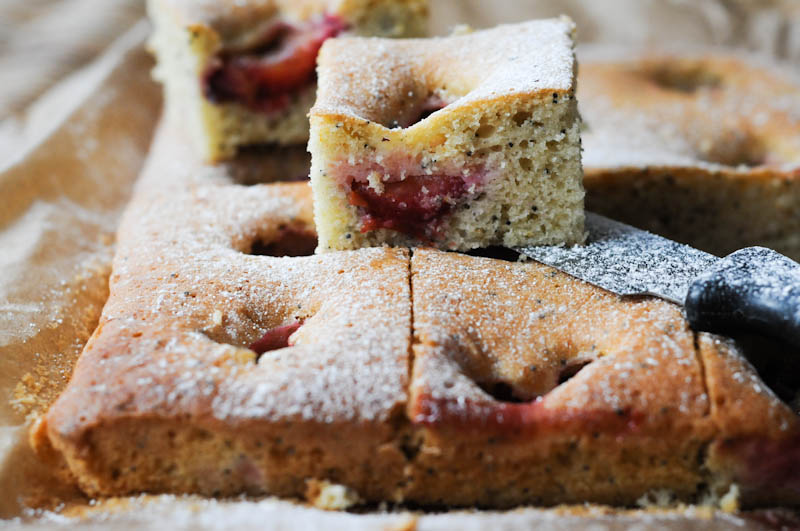
Poppy Seeds and Plums are two of my favourite things. Both remind me of my Polish heritage and childhood. Sweet plums…